This guide will walk you through the step-by-step process of setting up and mapping return reasons in the SWAP Dashboard. By configuring return reasons correctly, you ensure that customers selecting a return option in the Returns Portal have clear and predefined choices. These return reasons provide transparency and allow your business to collect valuable insights into why items are being returned, helping you optimize product quality, improve customer satisfaction, and refine your return policies.
Setting Up Return Reasons
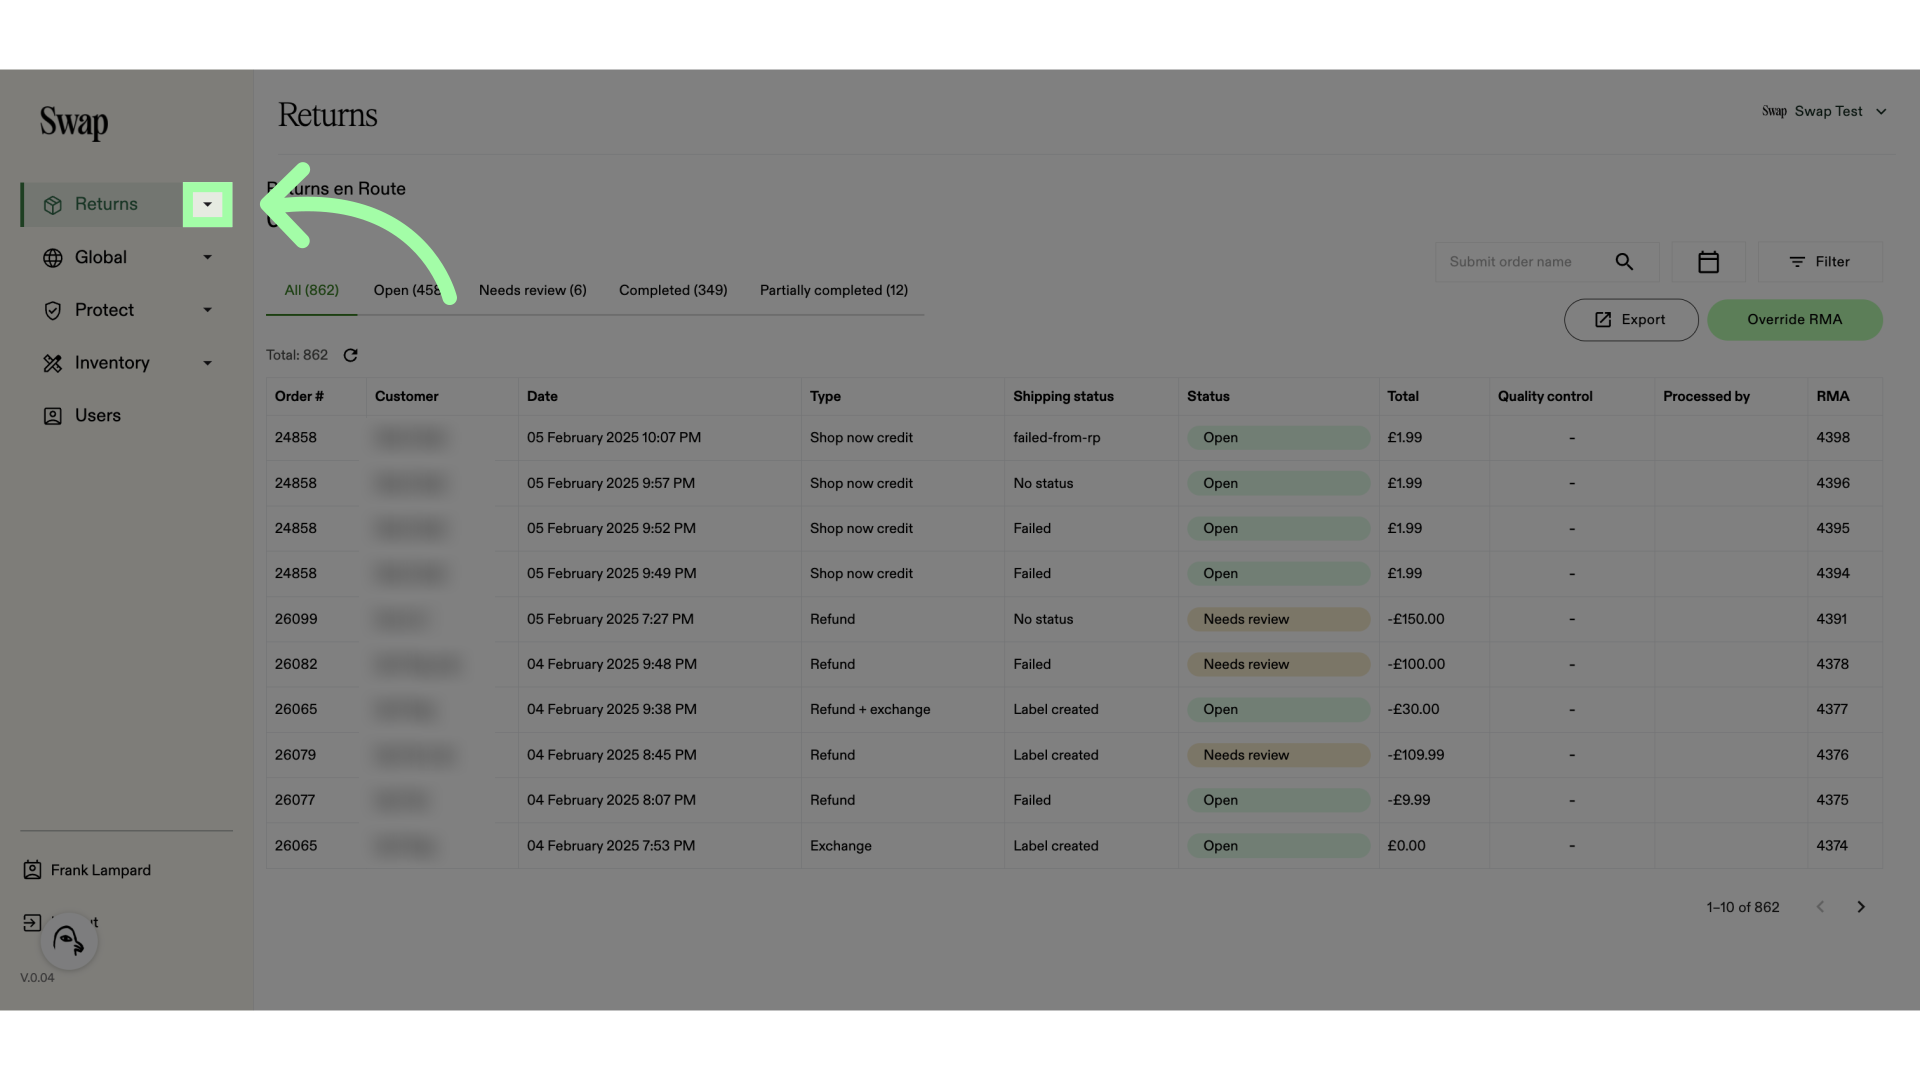 2. Click "Settings"
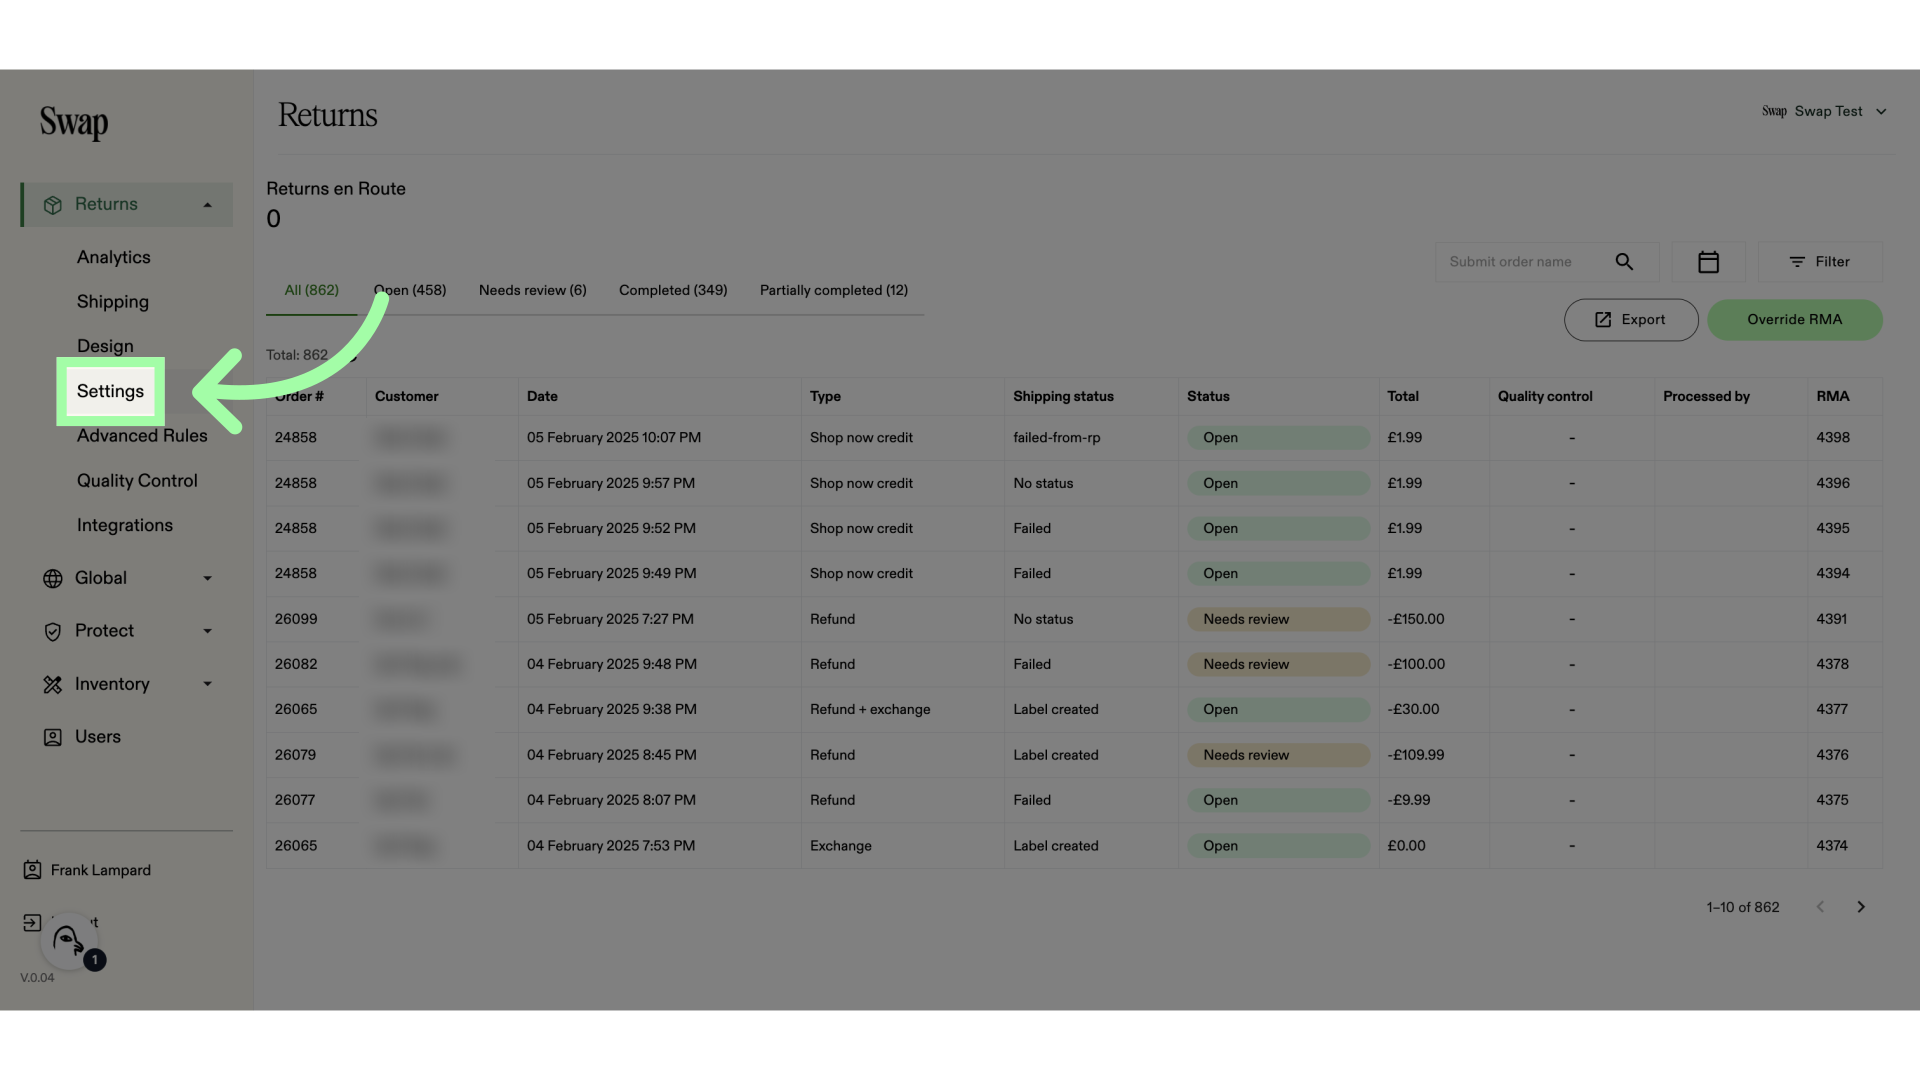 3. Open the "Return reasons" tab
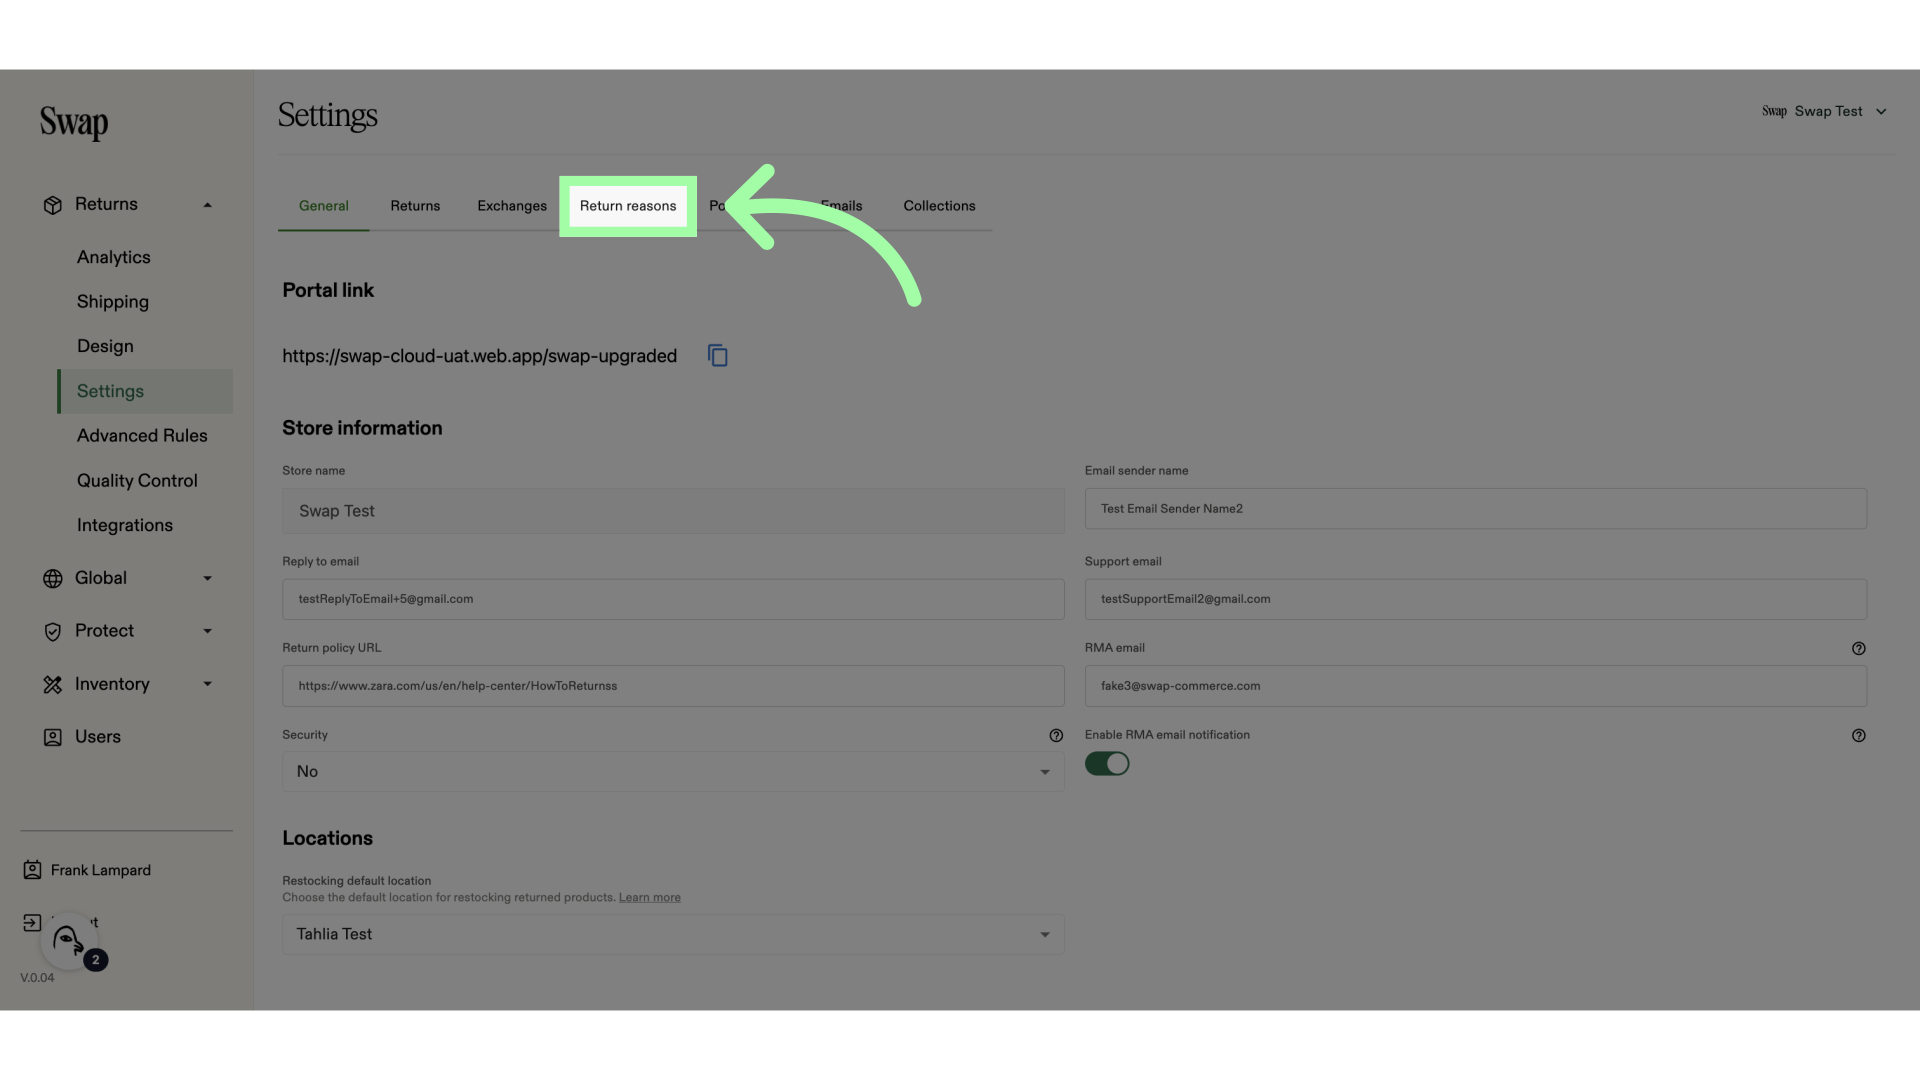 4. Click here to add a return reason
 5. Add a title. This will be visible to the customer
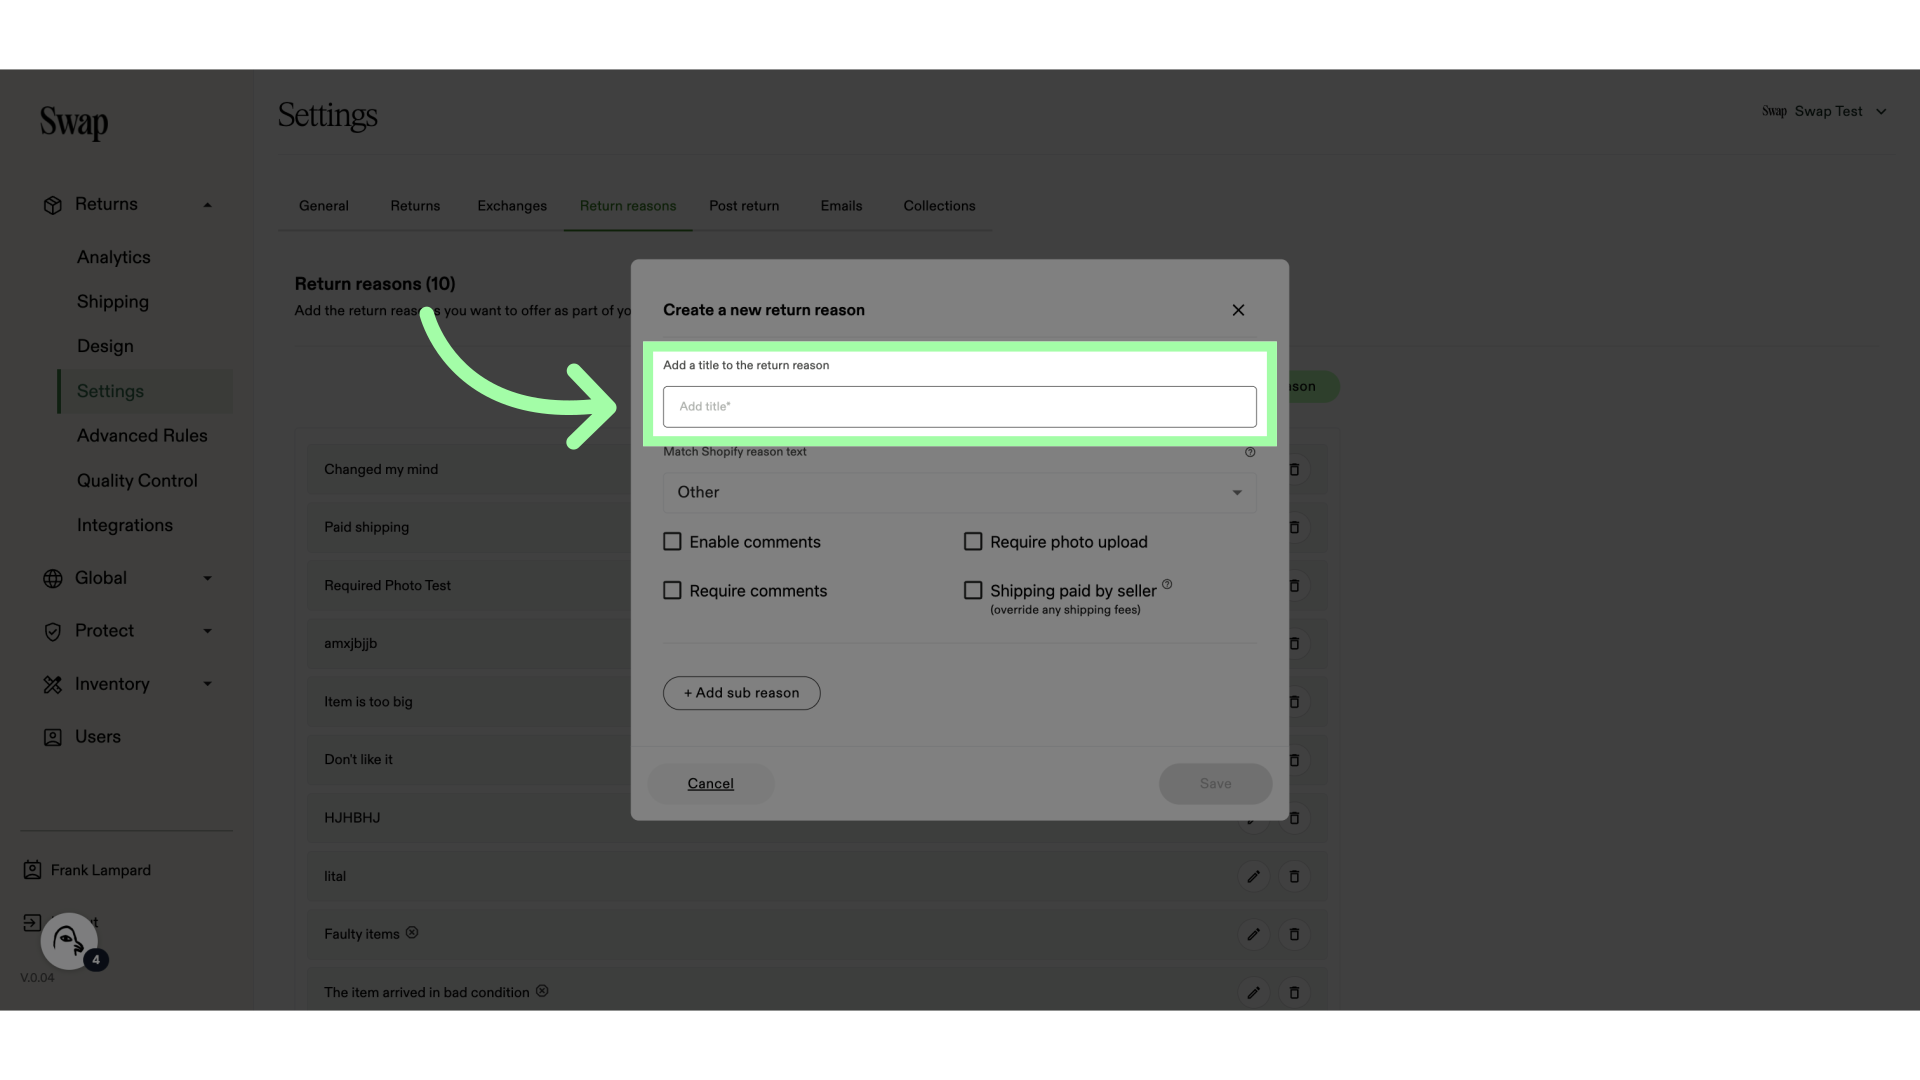
6. Map the return reason to a Shopify return reason. This will appear in the order on Shopify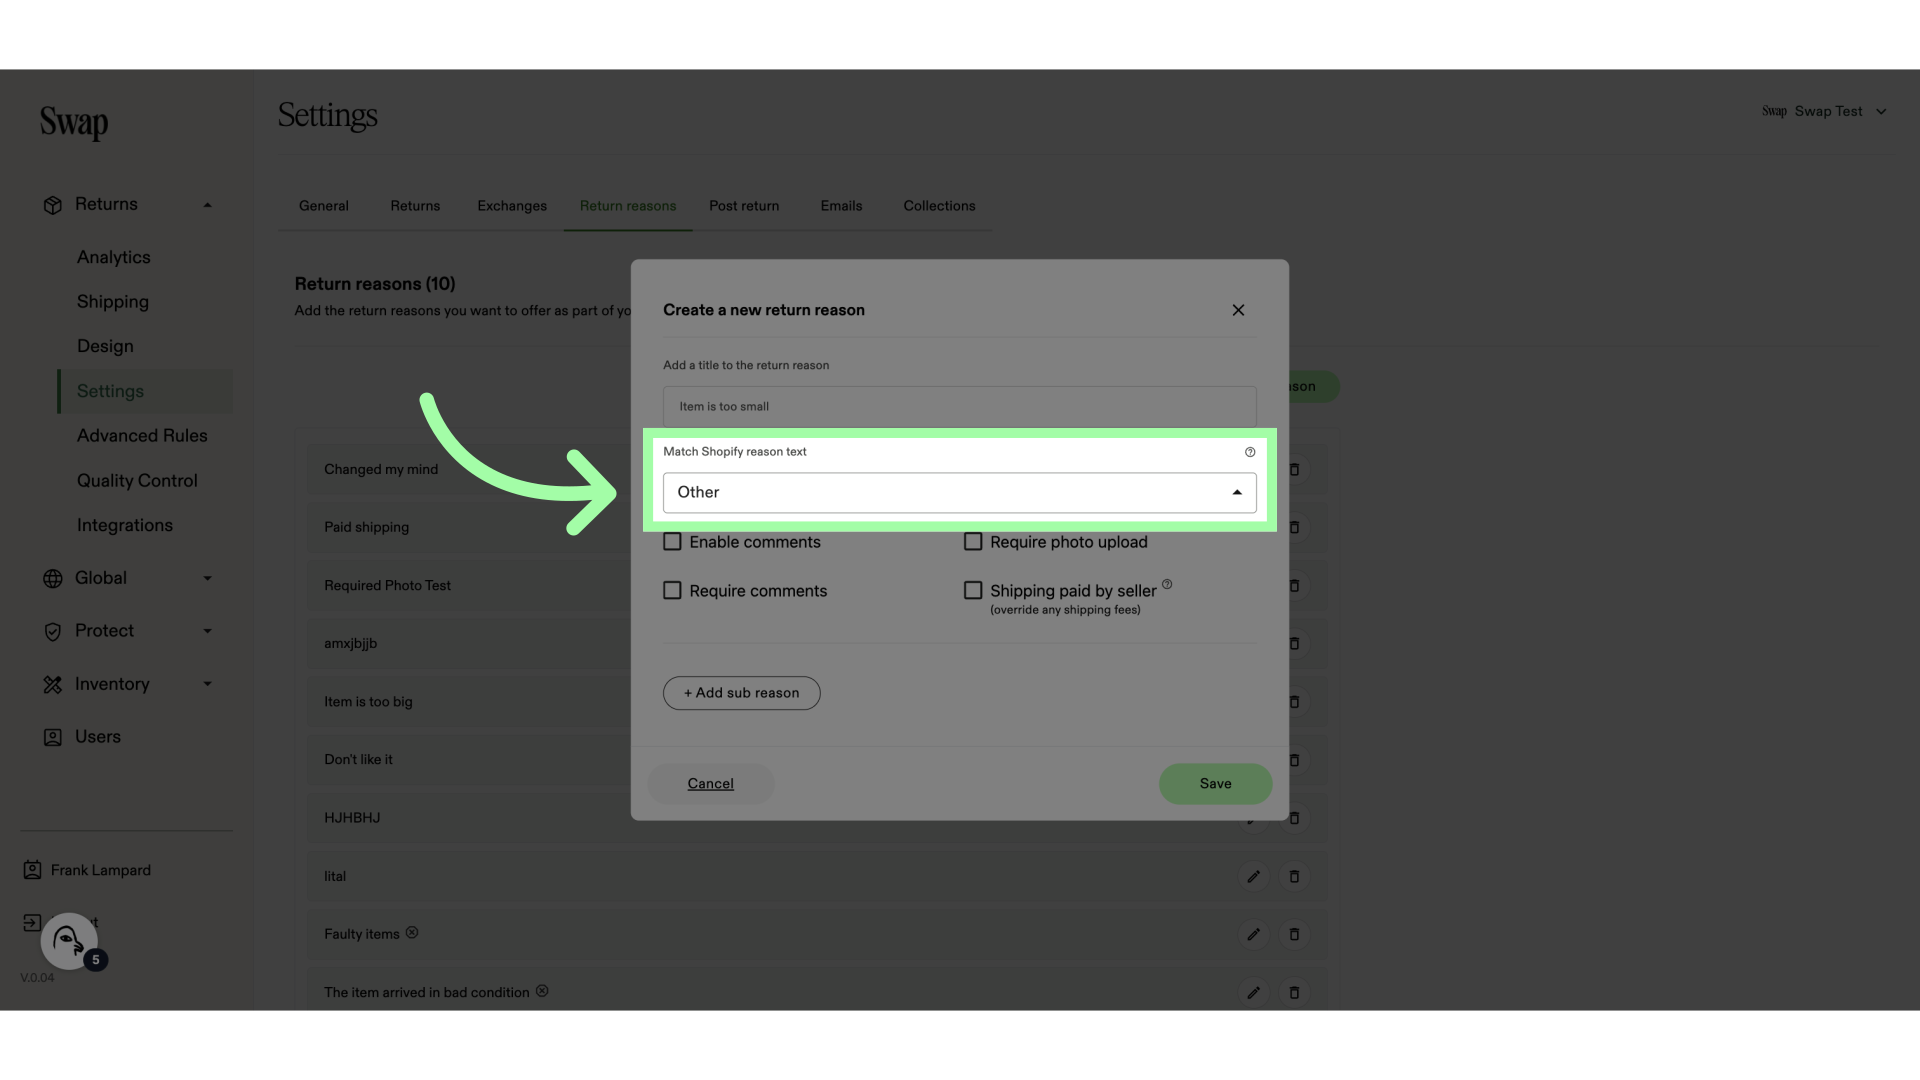 7. For example: "Size was too small"
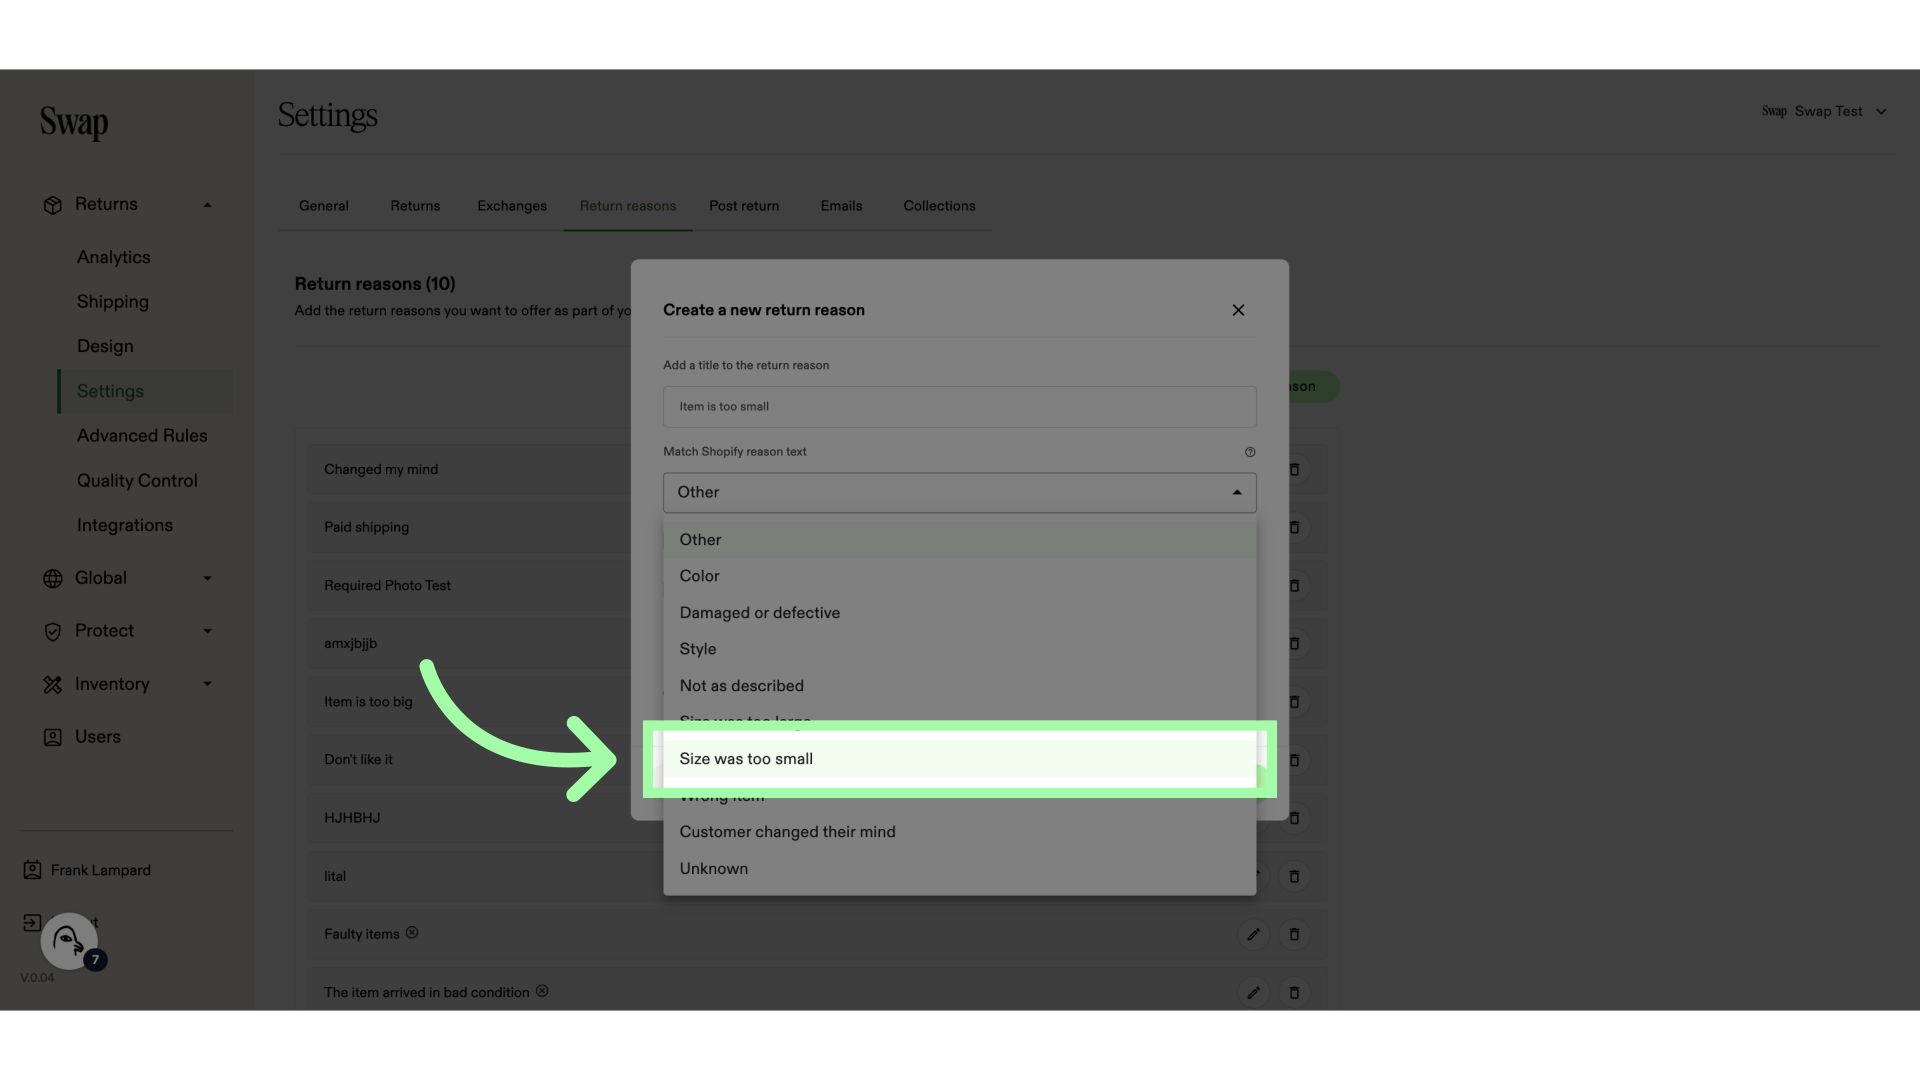 8. Enable these settings if necessary
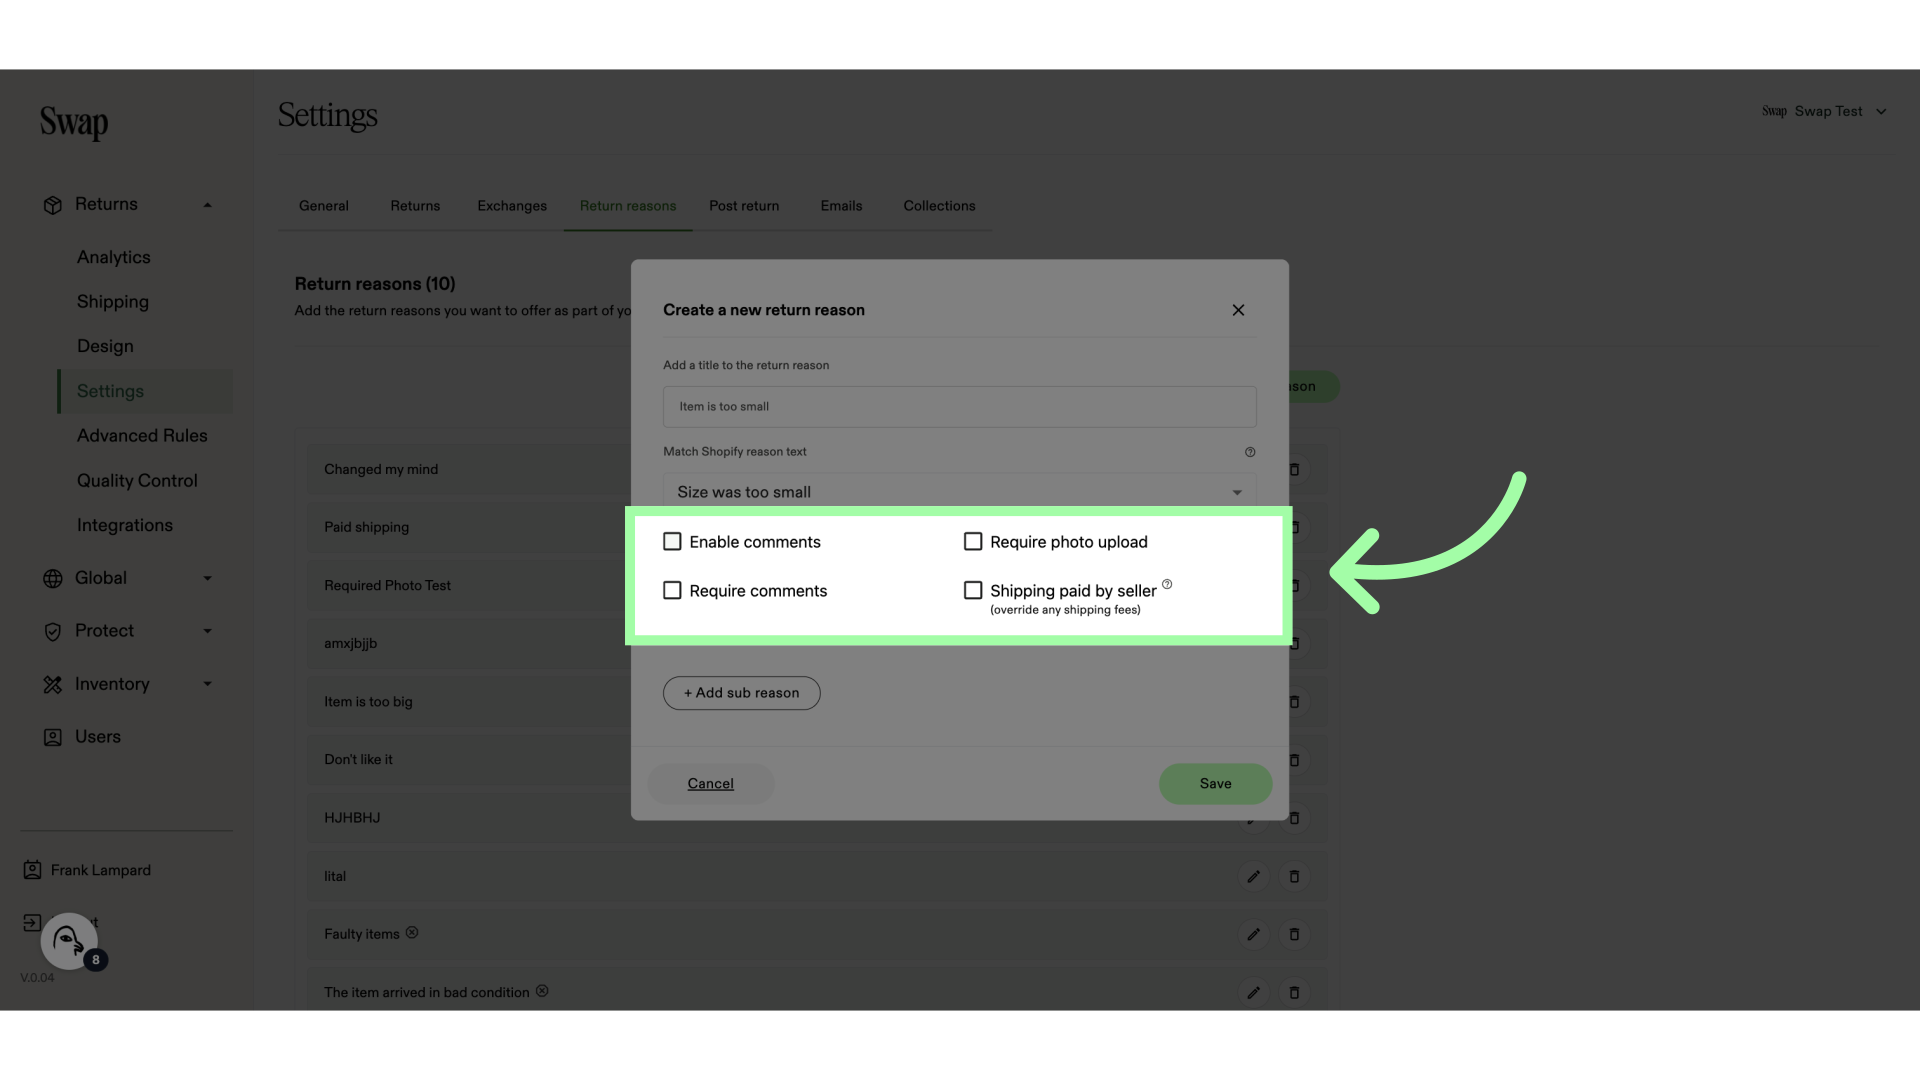 9. Optionally, you can add sub reasons by clicking "+ Add sub reason"
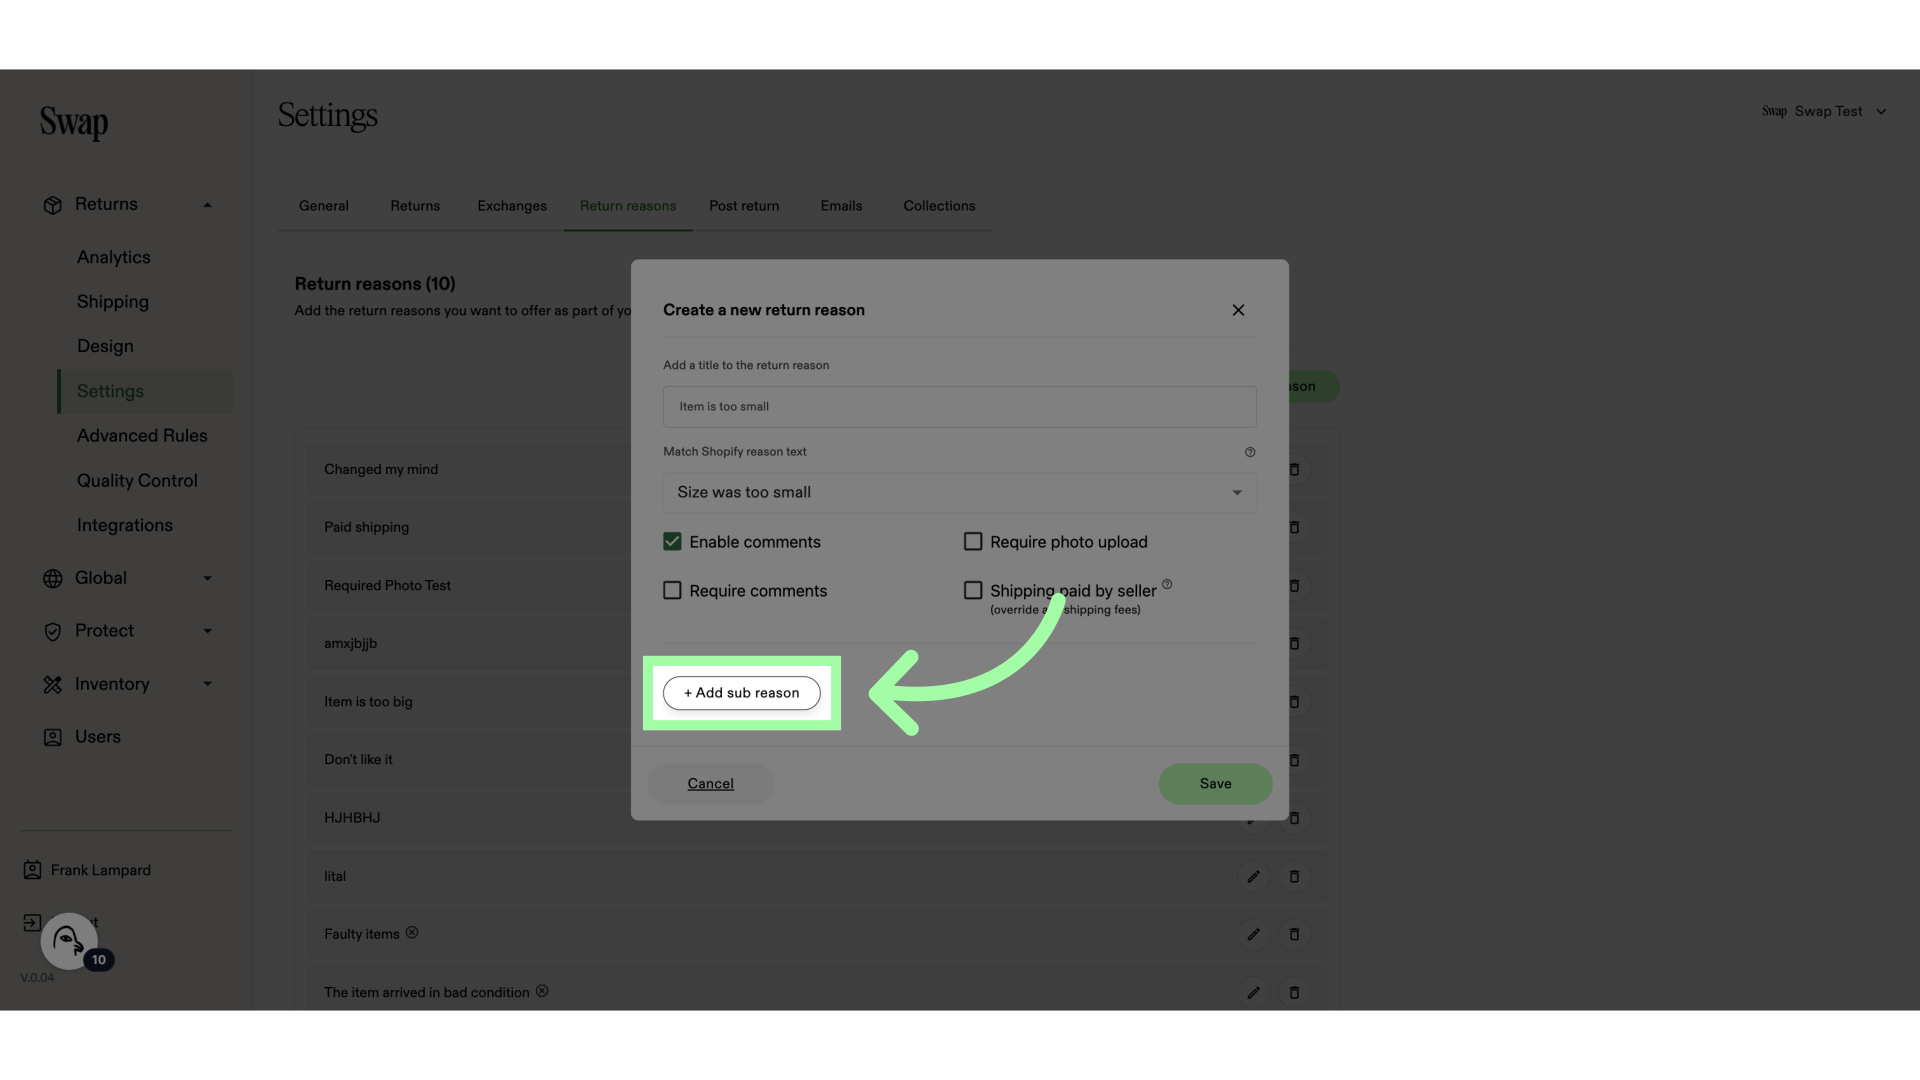 10. Name the sub reason
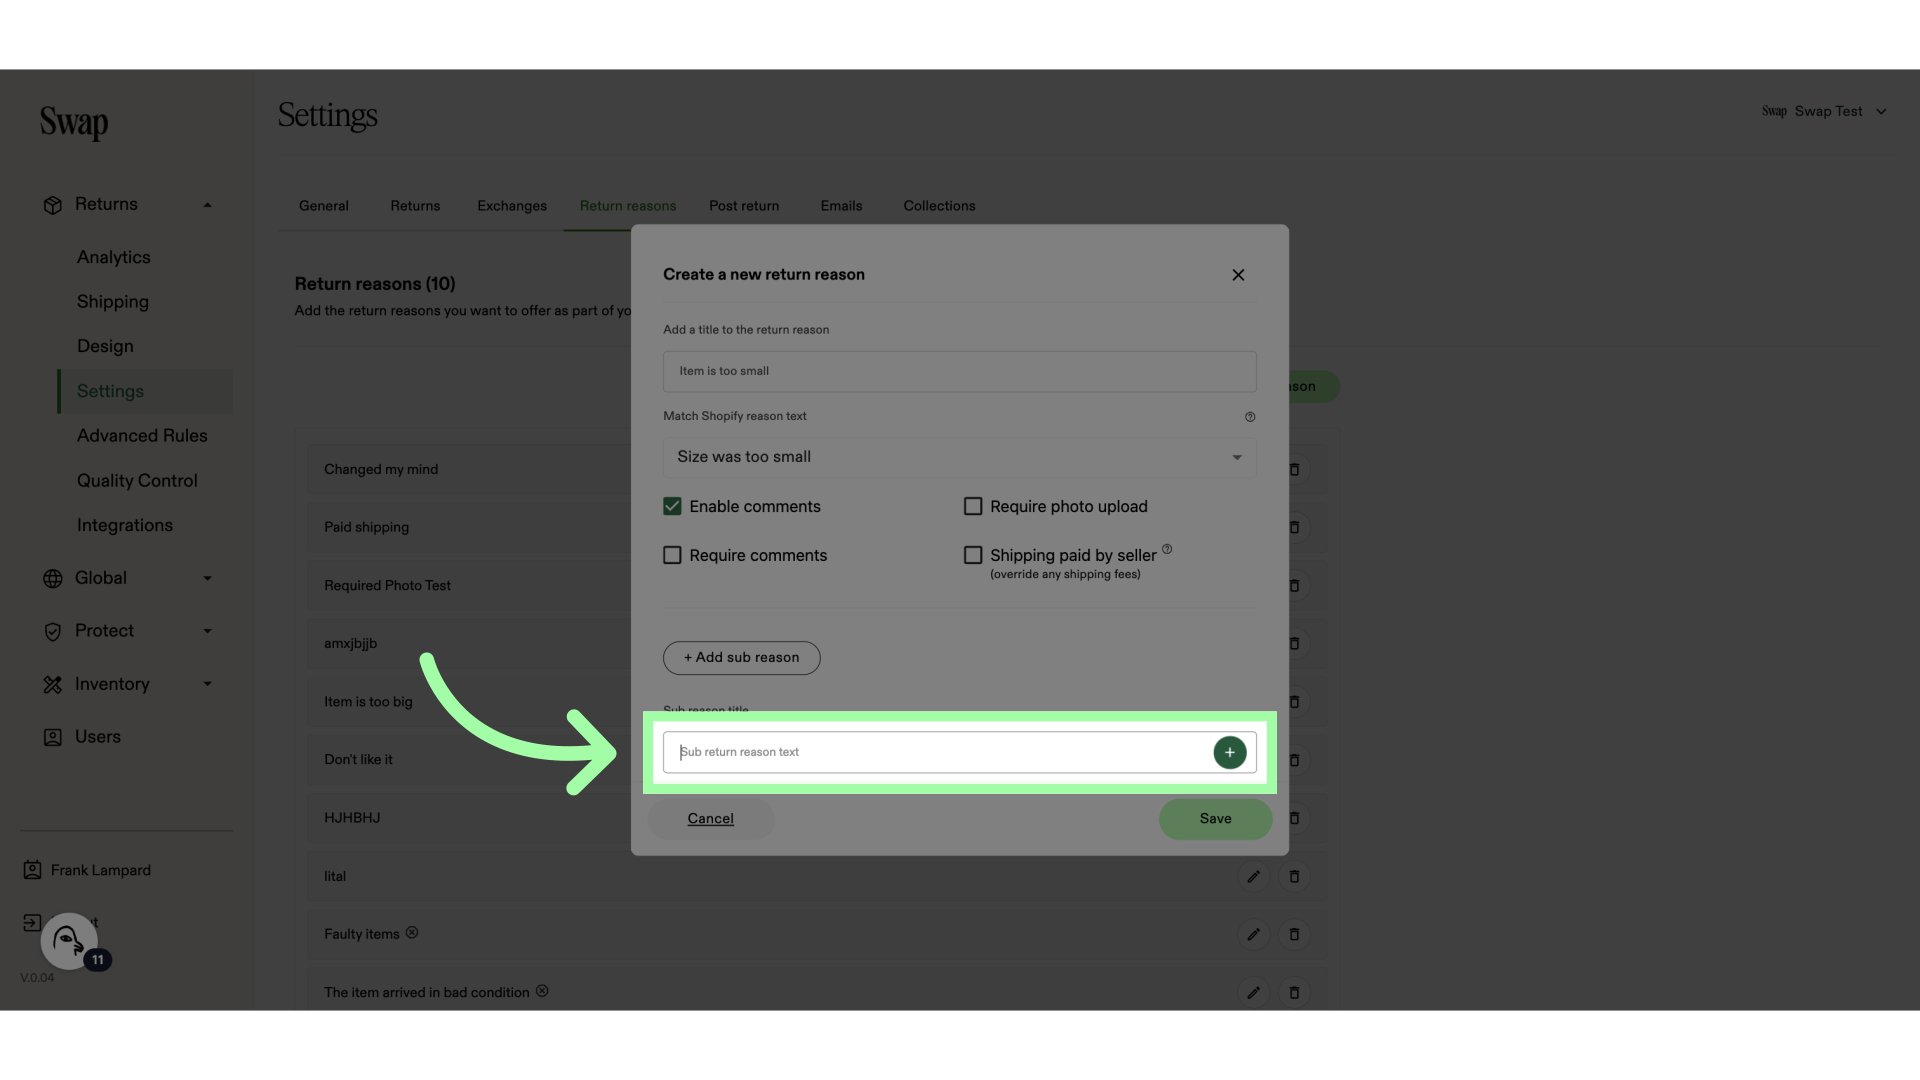
11. Click here to add the sub reason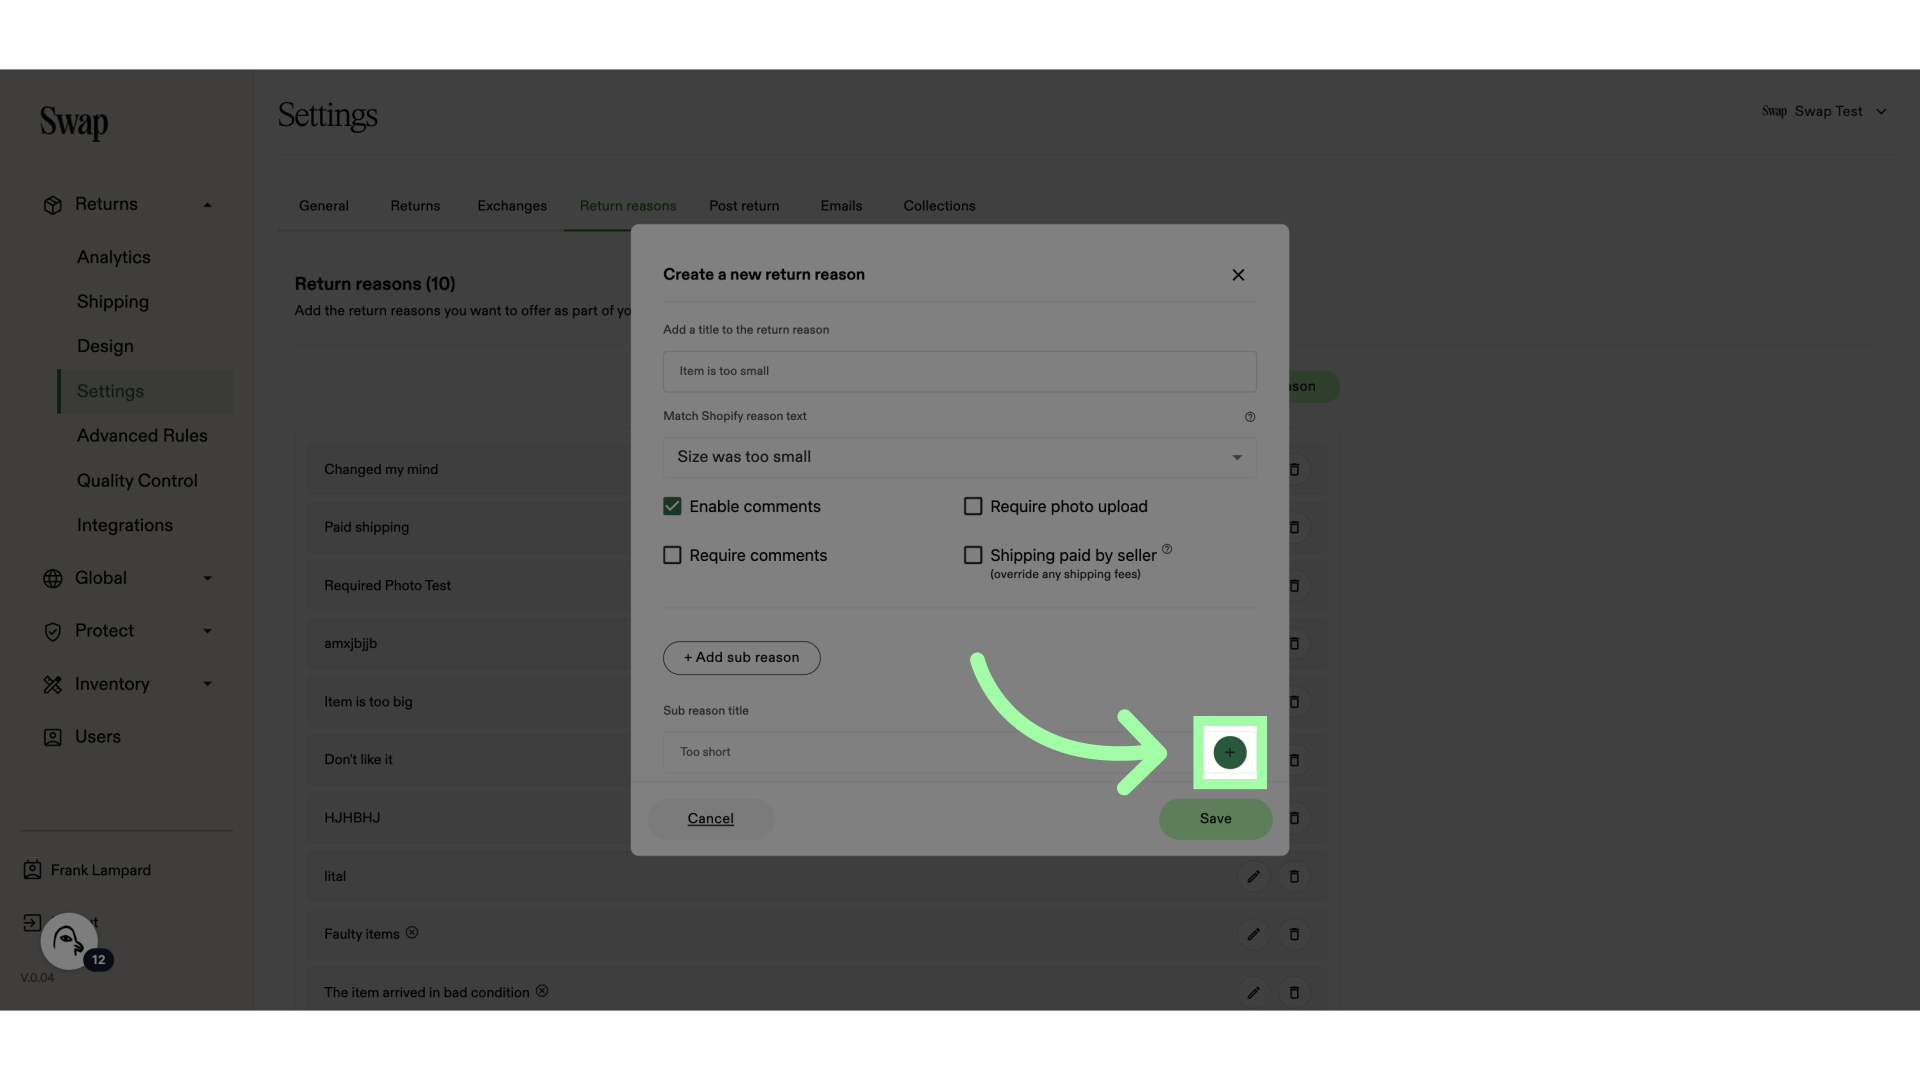 12. Click "Save"
 13. You can edit, or delete a return reason with these buttons
7. For example: "Size was too small"8. Enable these settings if necessary9. Optionally, you can add sub reasons by clicking "+ Add sub reason"10. Name the sub reason11. Click here to add the sub reason
12. Click "Save"13. You can edit, or delete a return reason with these buttonsRelated to