Providing your customers the option to return items via their ‘Own Label’ means they can purchase their own shipping label through any carrier they prefer. This option exempts them from return shipping fees typically incurred through the returns portal. ‘Own Label’ can be set up for customers in any country you select, including those where a carrier label is already offered.
How It Works
When customers choose the ‘Own Label’ option, they will receive return instructions on both the confirmation page of the return portal and in their return confirmation email. The instructions can be customized to fit your specific needs.
Suggested Return Instructions
“Please send your unwanted items to the store's return address below. To ensure that items arrive and can be tracked, we recommend using a tracked service from the carrier of your choice. Please ensure to email your return tracking number to [your support email address] so that your return can be tracked.
[YOUR RETURN ADDRESS]”
Important Considerations
- Tracking Limitations: When customers opt for 'Own Label', their return shipment tracking will not be linked in the Swap dashboard. Consequently, the delivery status (Pre-transit, In-transit, Delivered) will not be shown.
- Monitoring Returns: Due to the lack of integration with the Swap dashboard, it is advisable to filter and review ‘Own Label’ returns regularly to ensure timely processing.
Customisation and Support
You can customise the text in the return instructions to suit your brand’s tone and requirements. Ensure that customers are aware of the necessity of emailing their return tracking number to your support team to facilitate tracking and processing their returns.
Setting Up Self Shipping
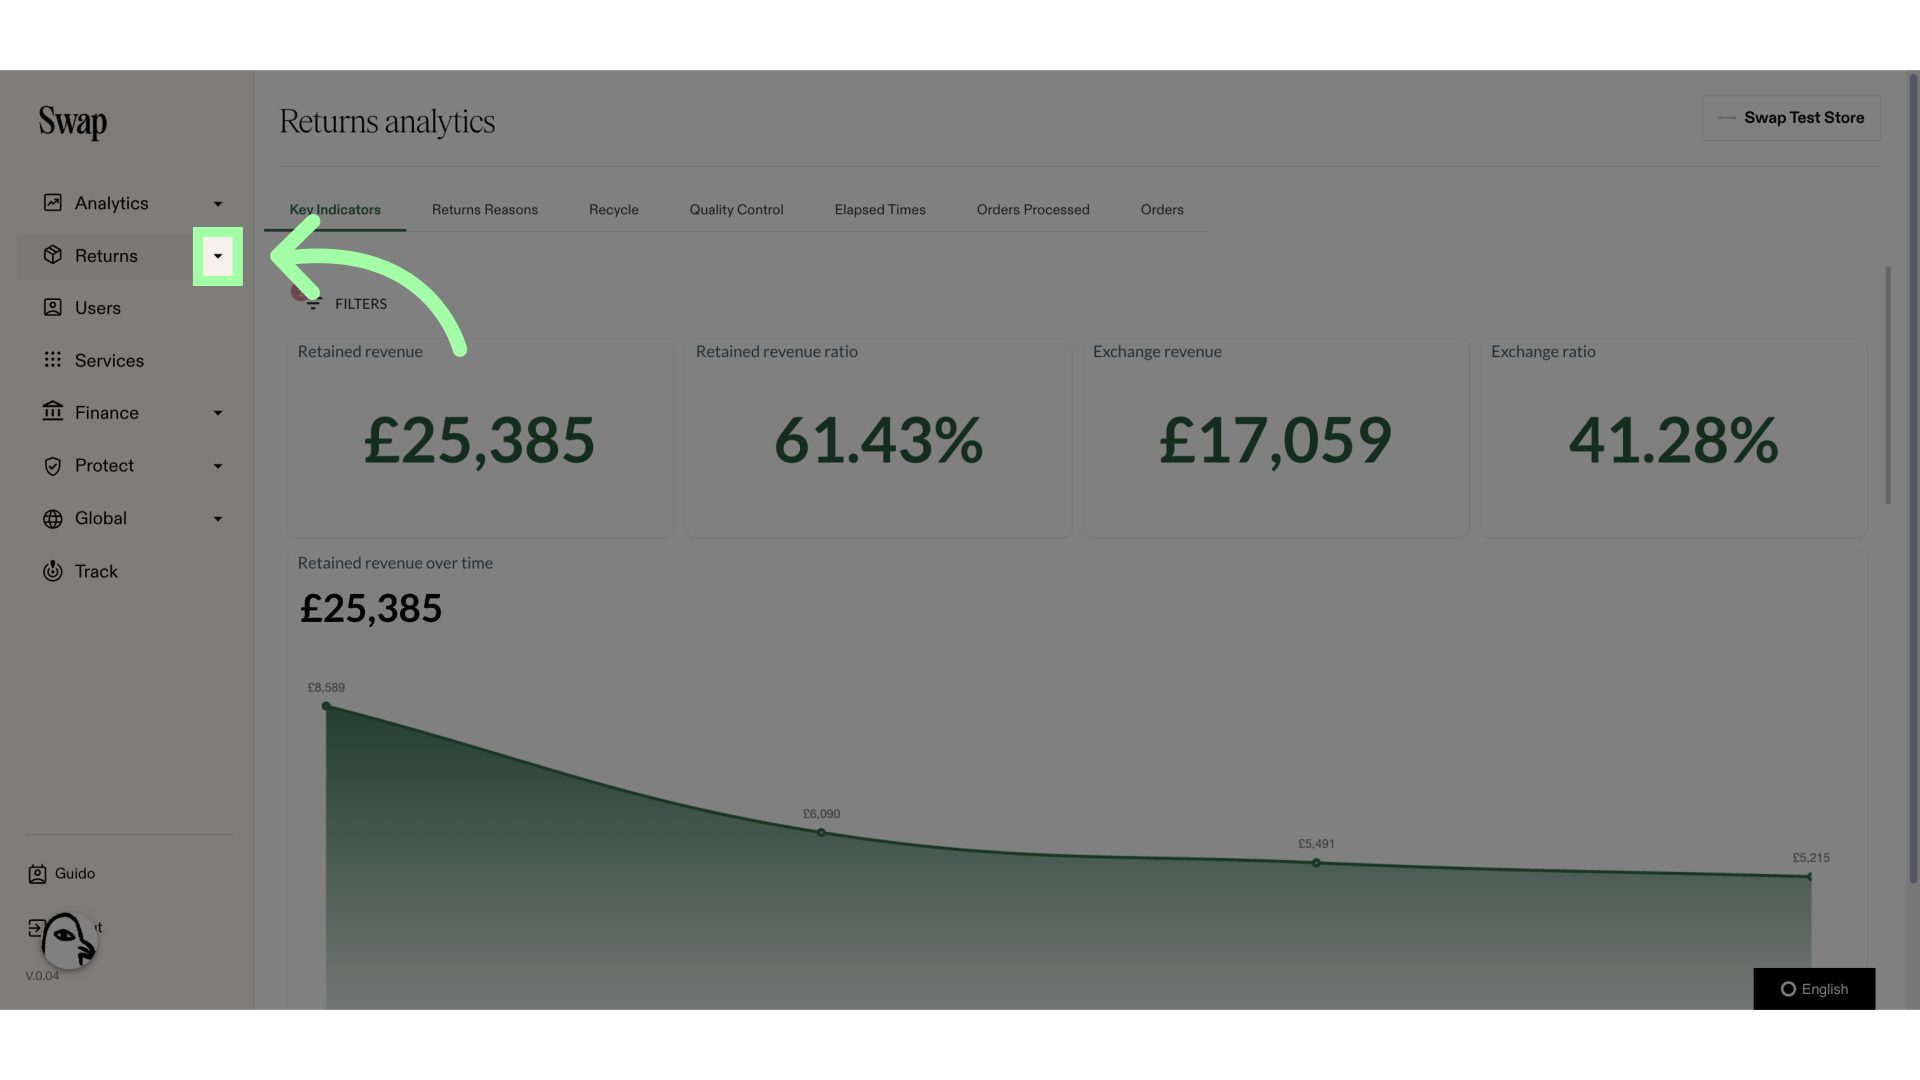
1. Open the Returns drop-down menu
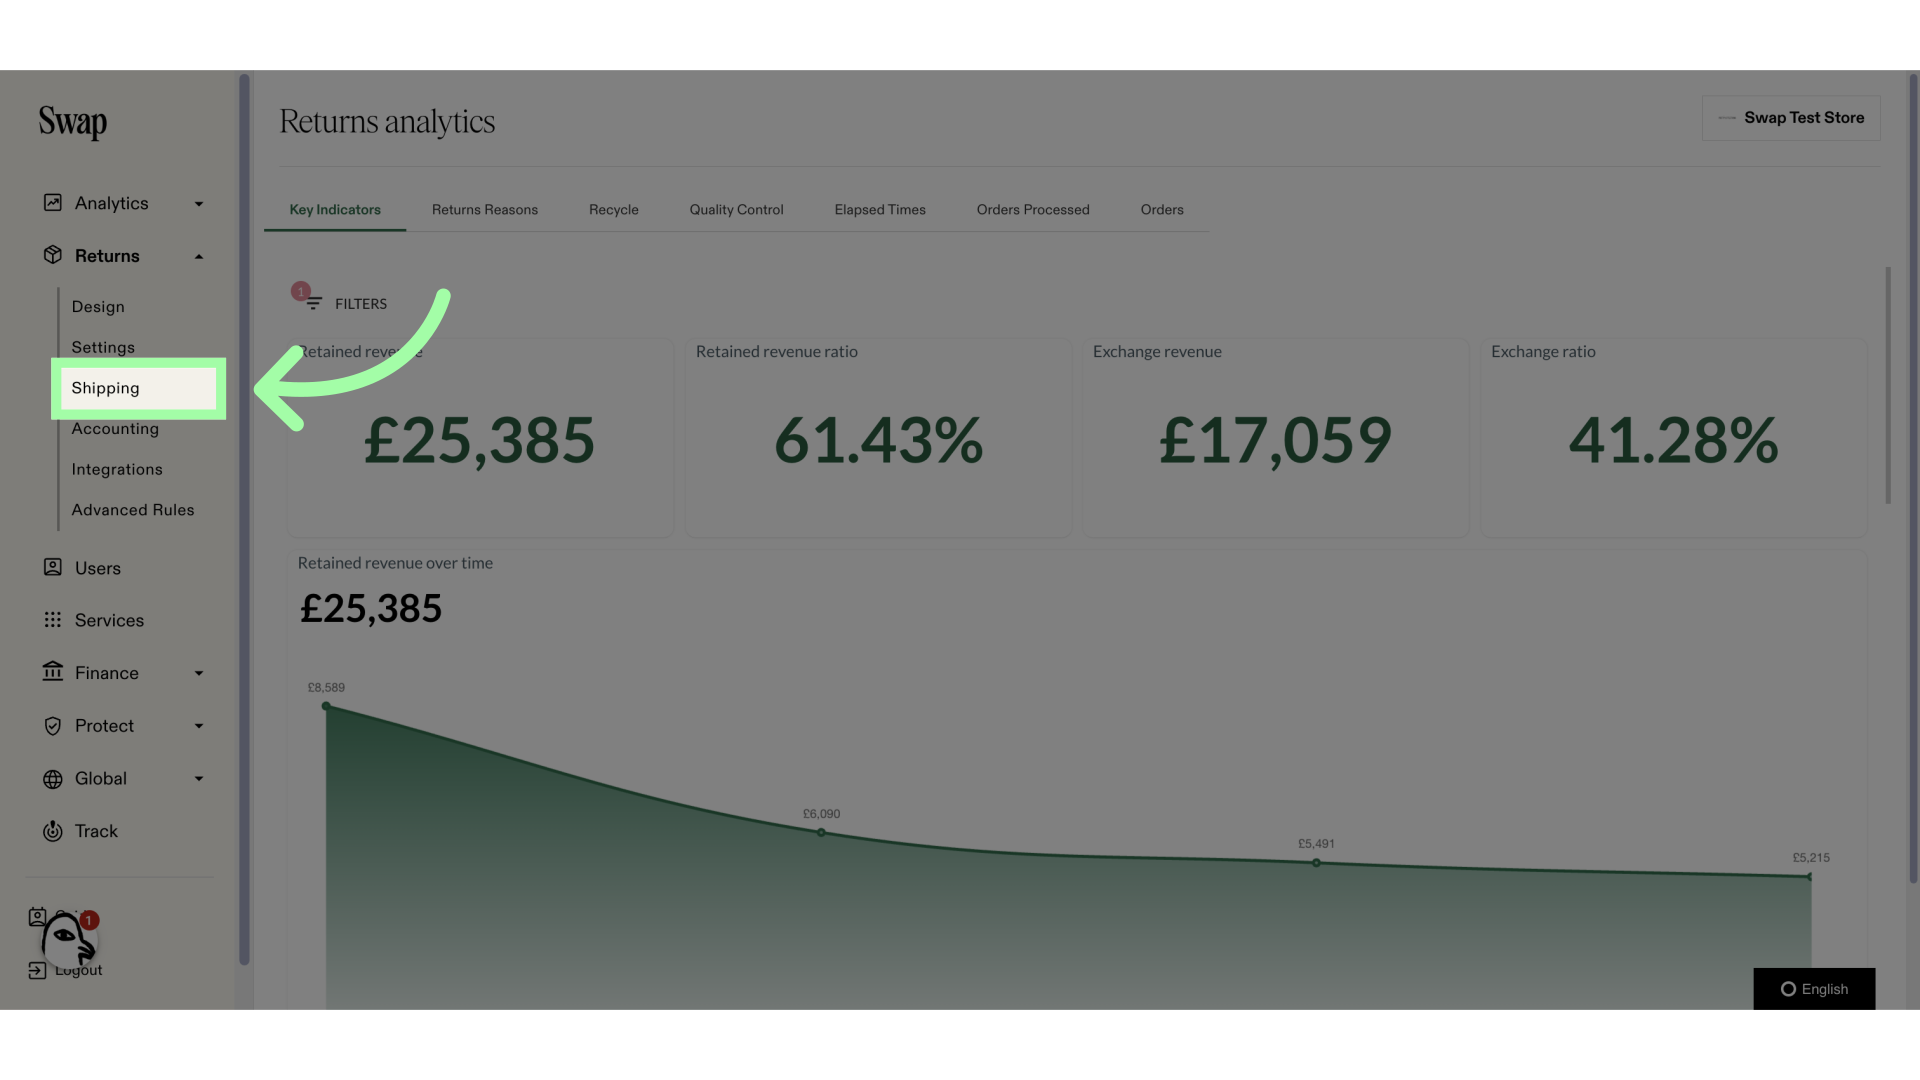
2. Click "Shipping"
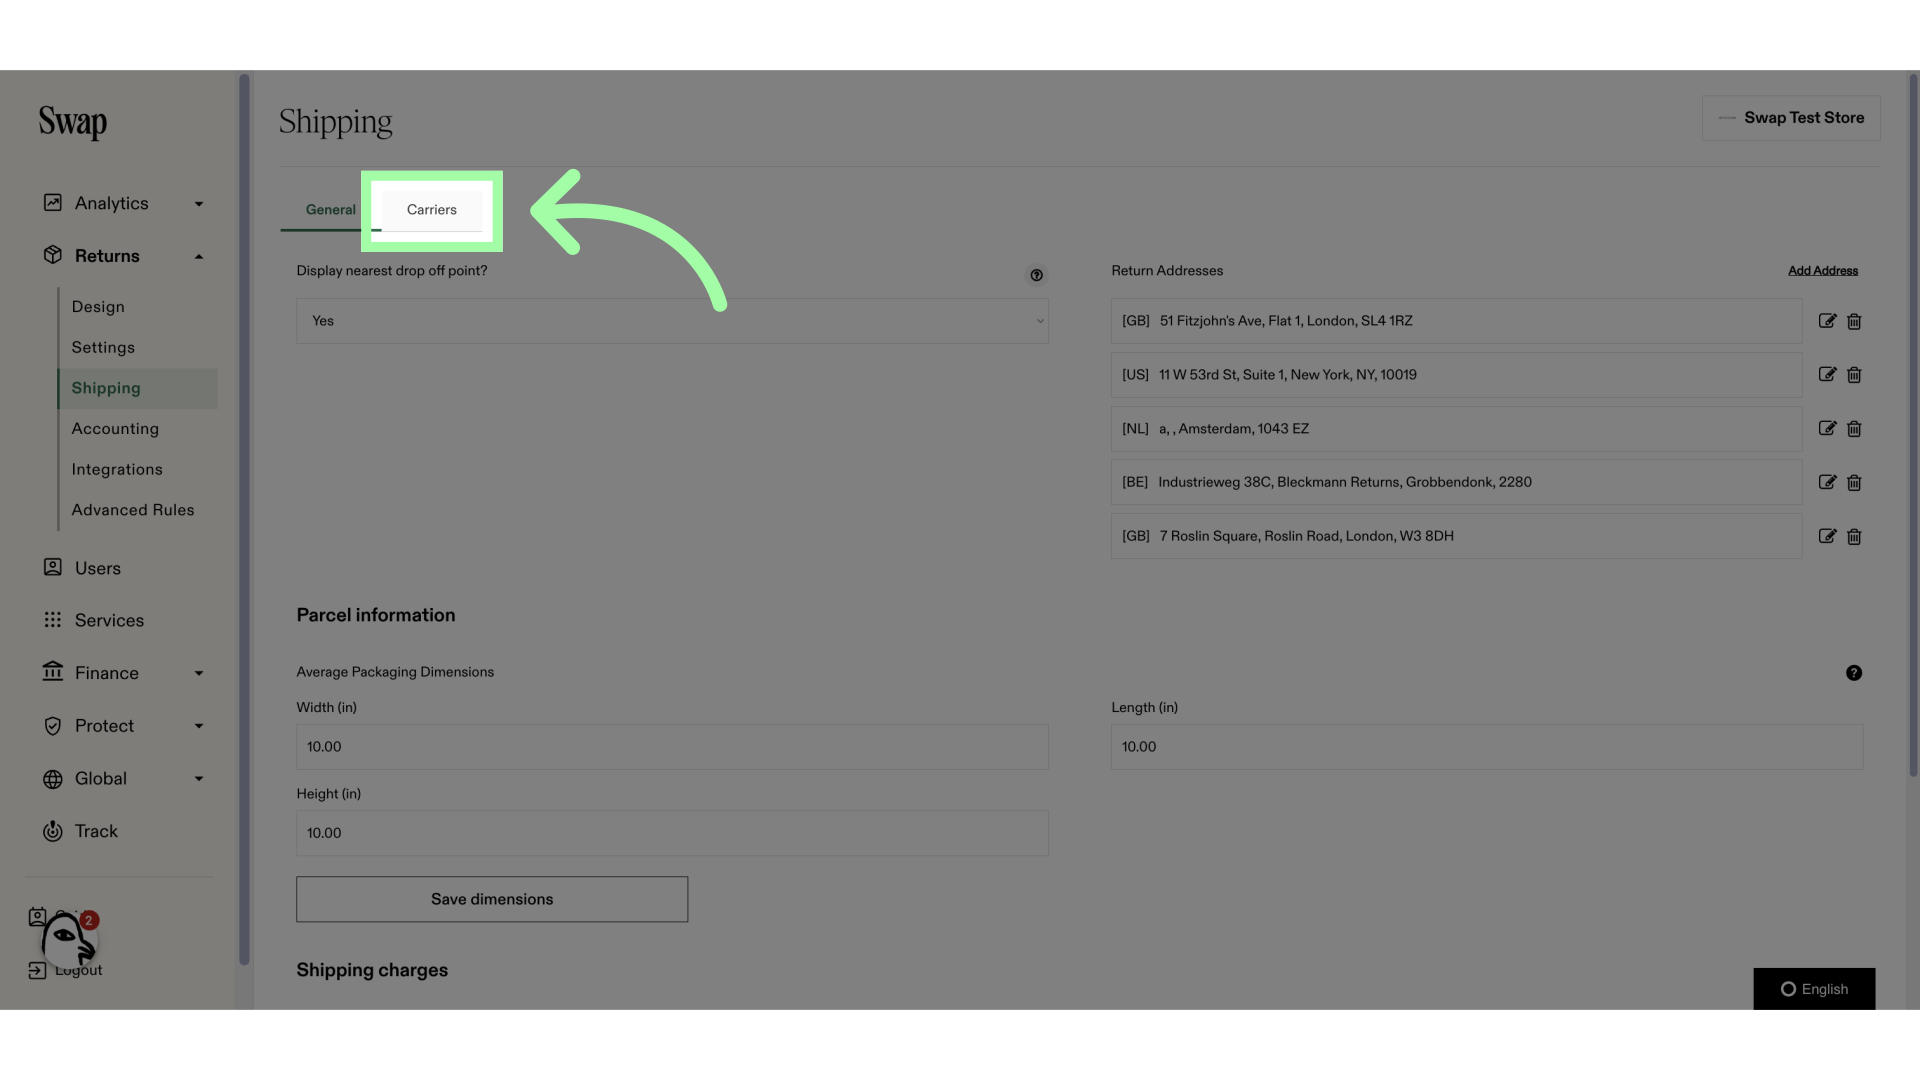
3. Open the "Carriers" tab
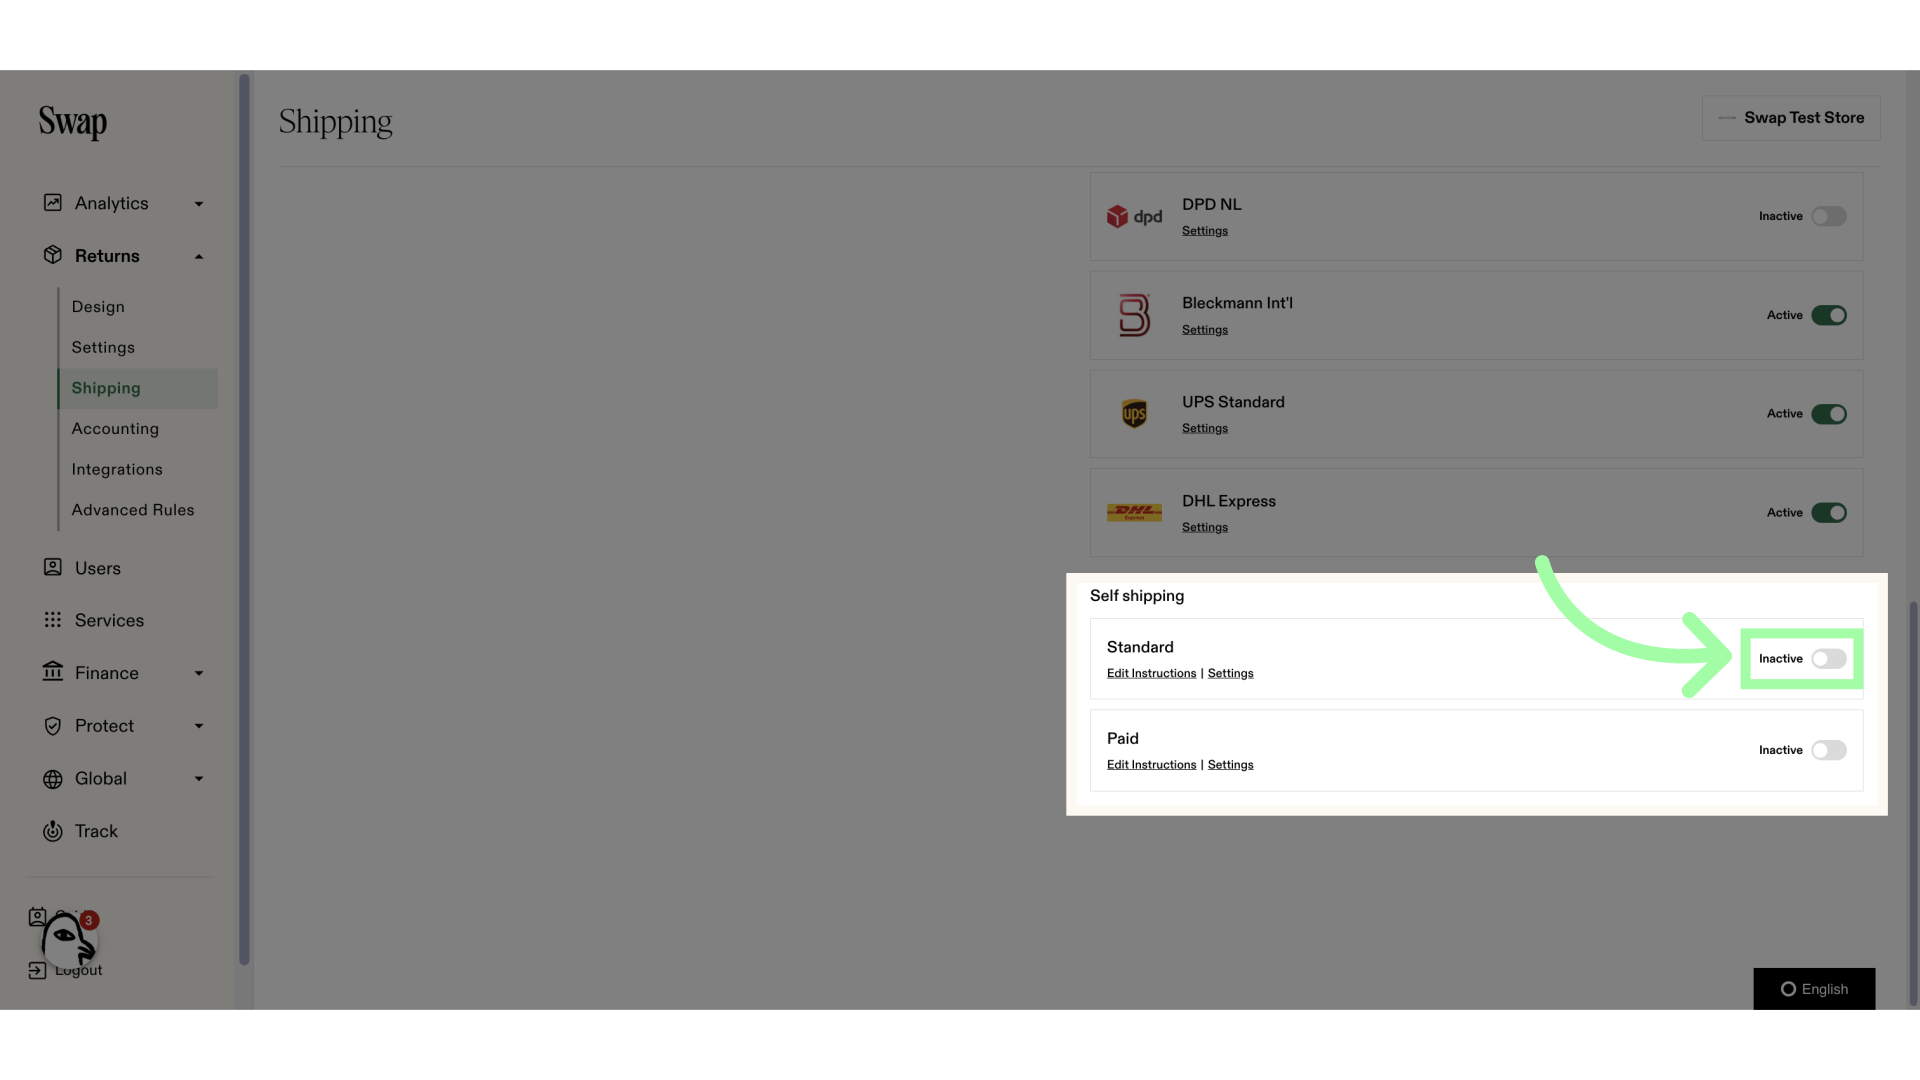
4. Under "Self shipping", click the toggle to enable self shipping
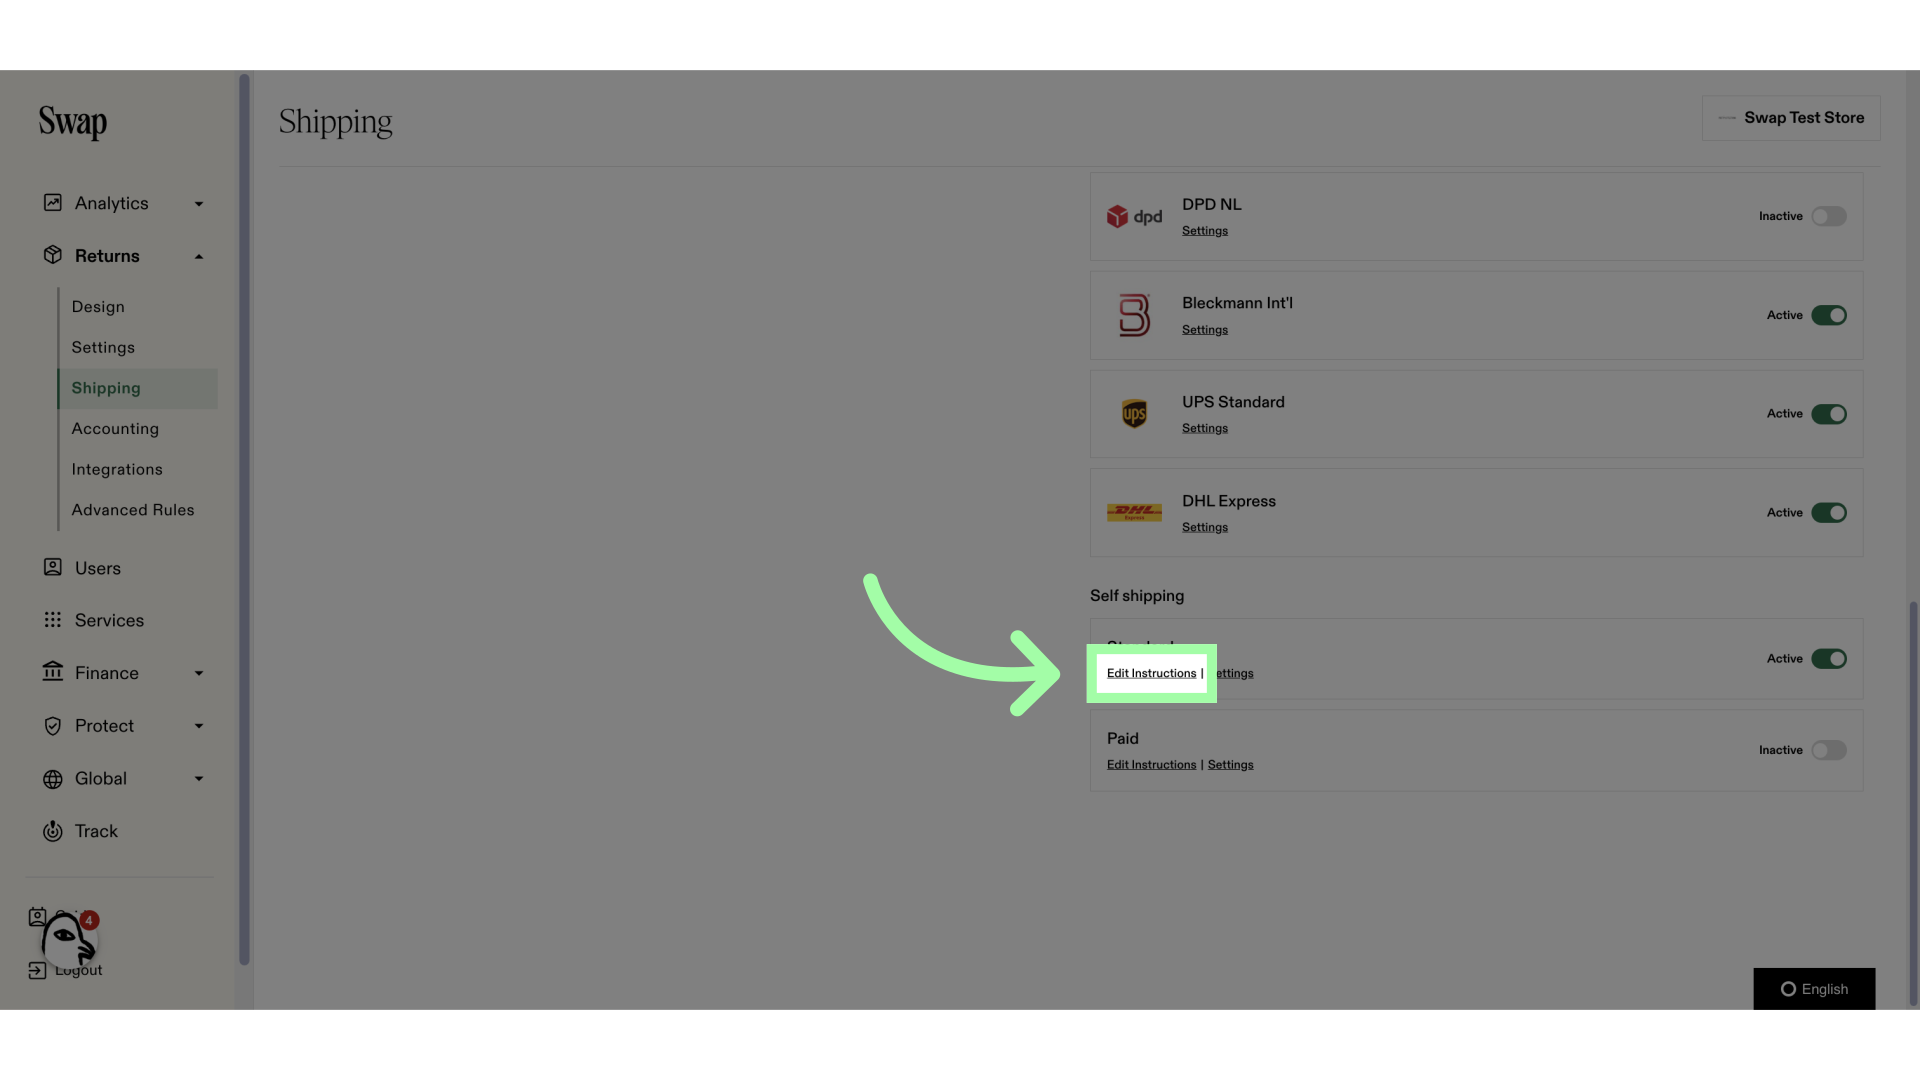
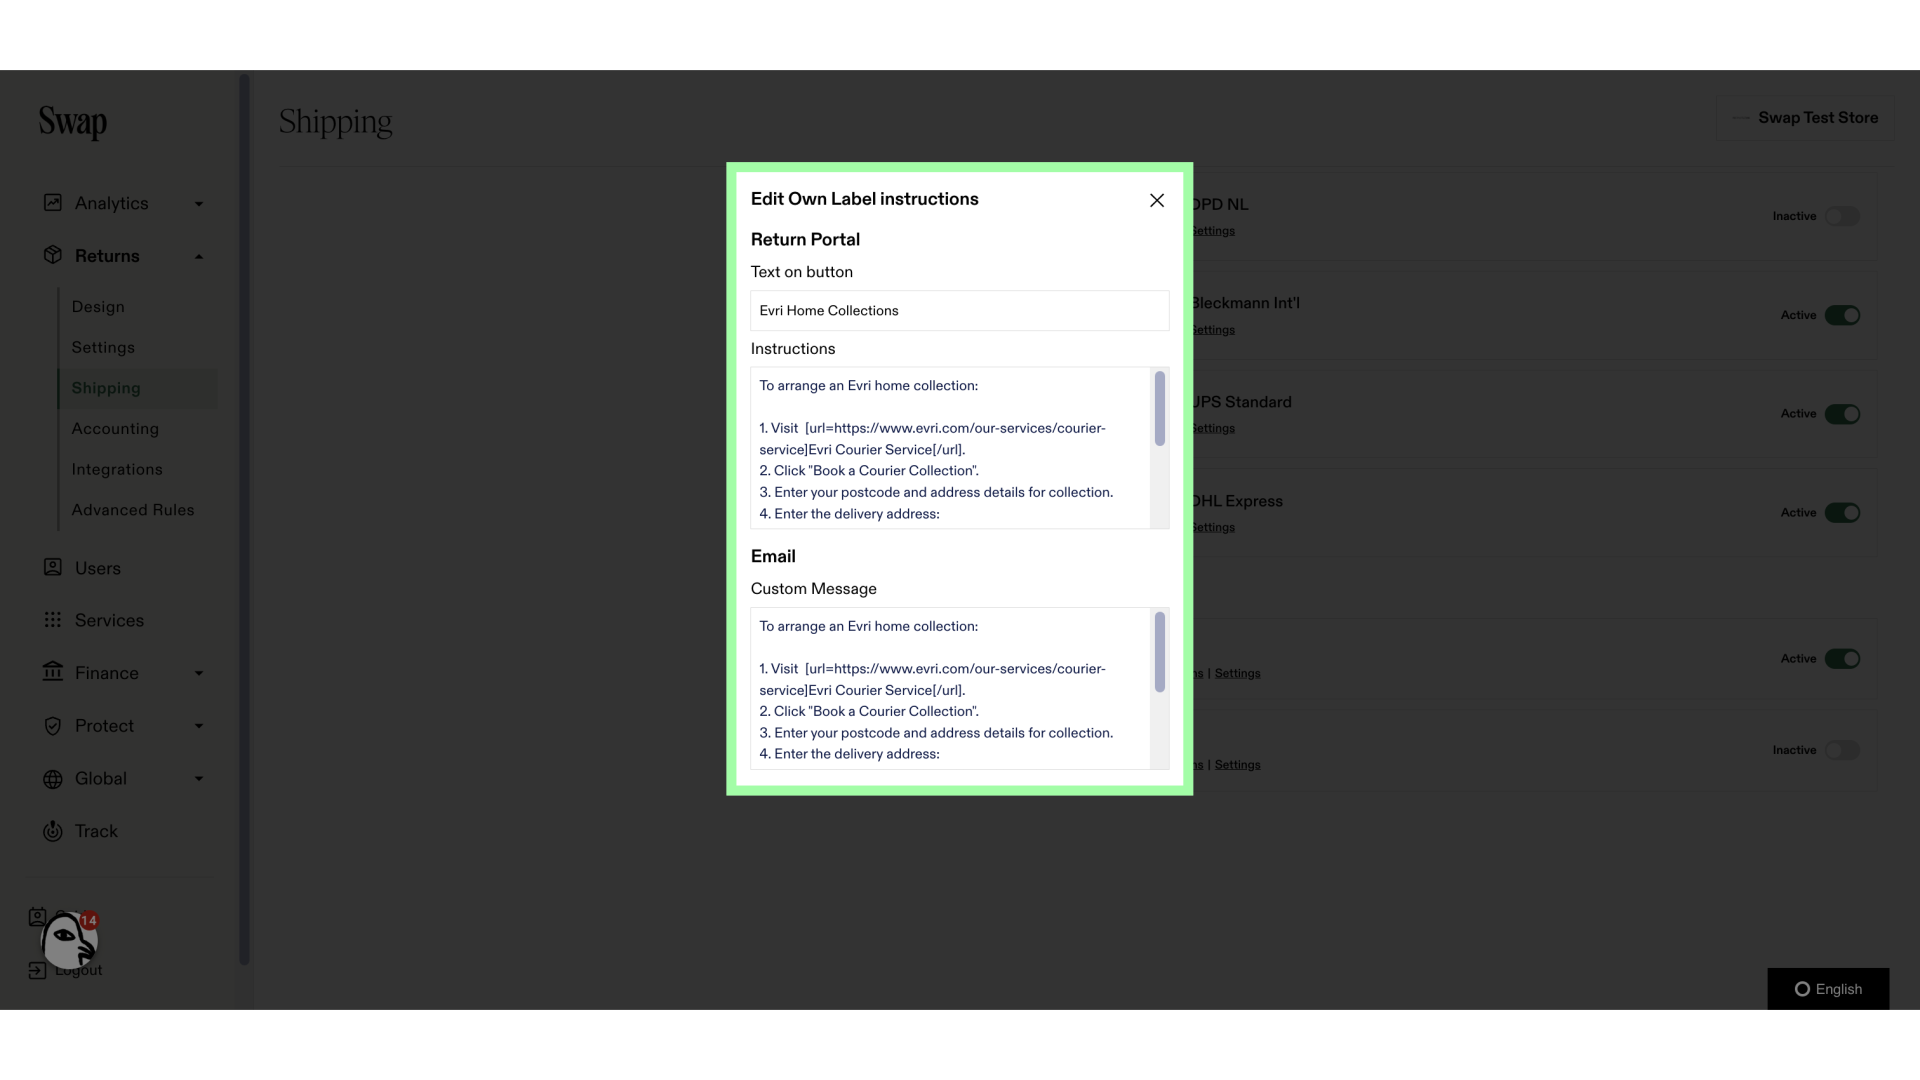
5. Click "Edit Instructions"
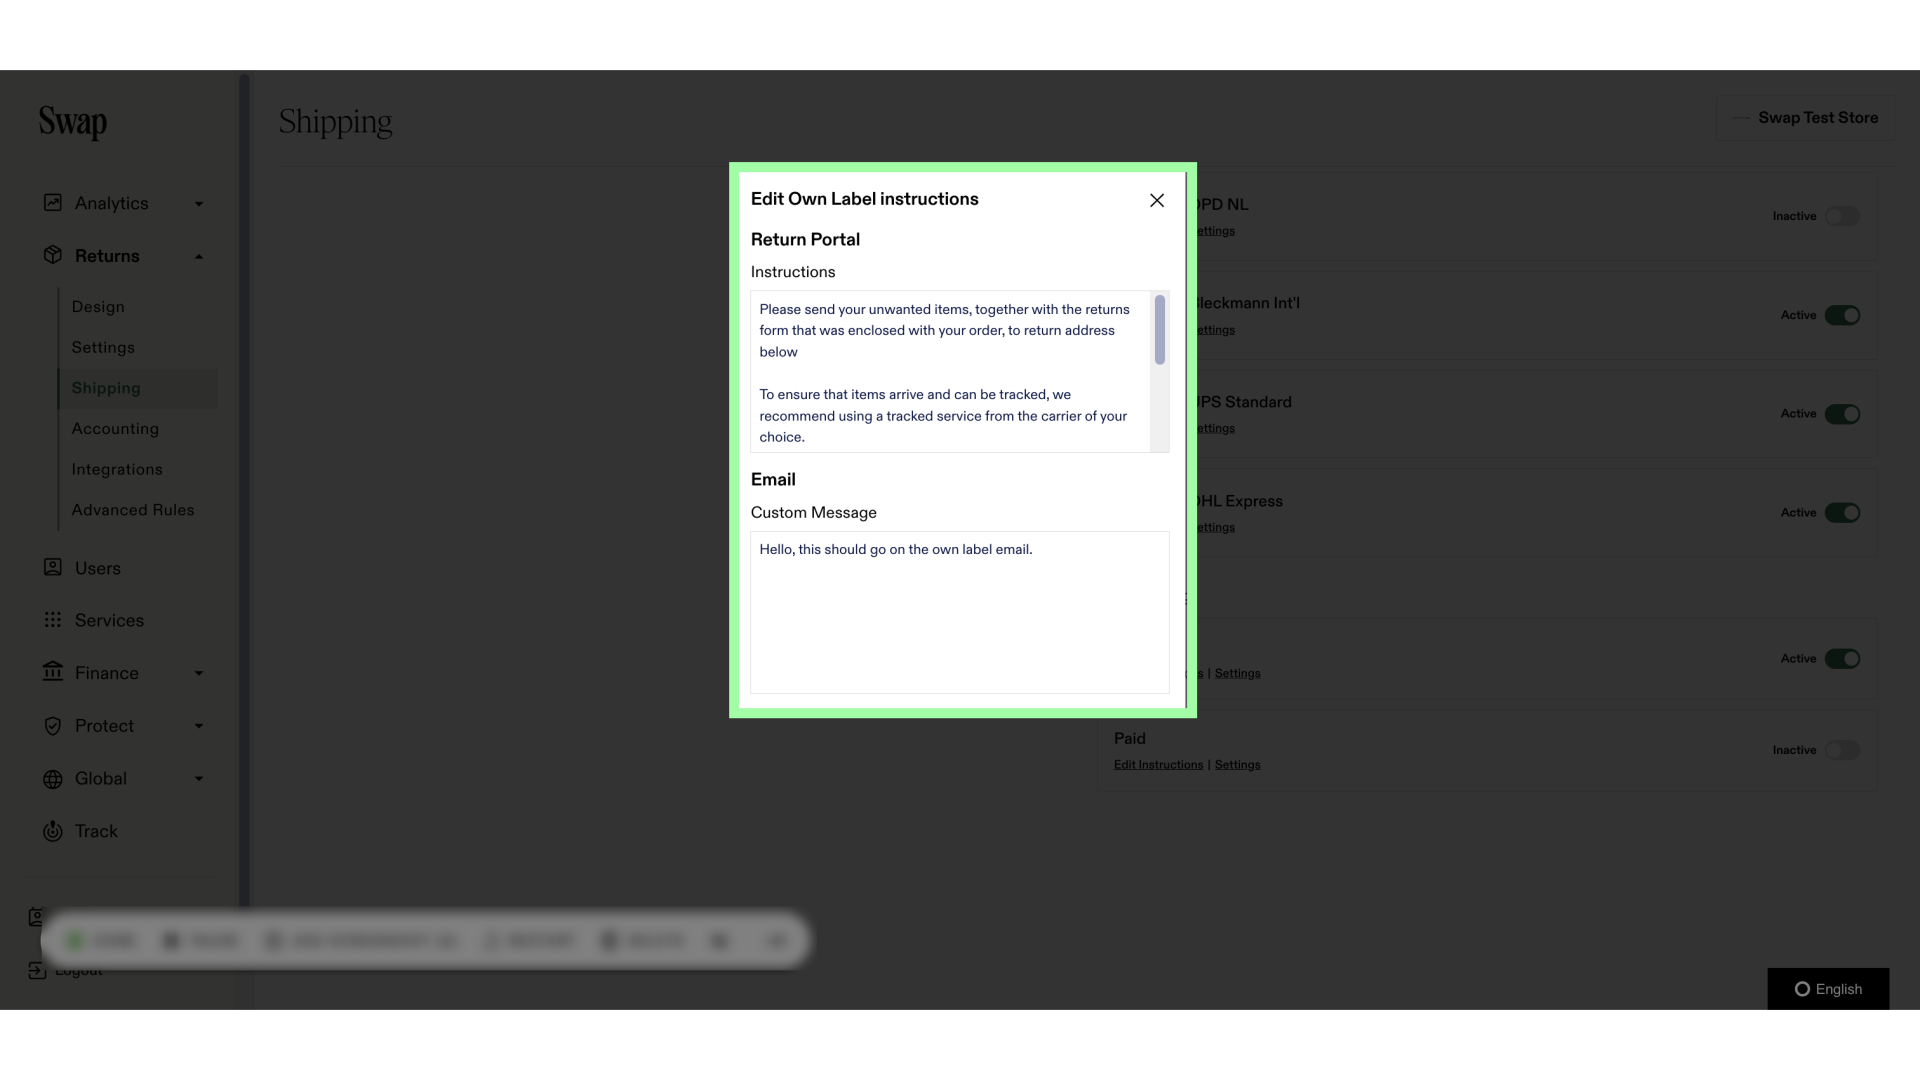
6. Add the return instructions and a custom email message
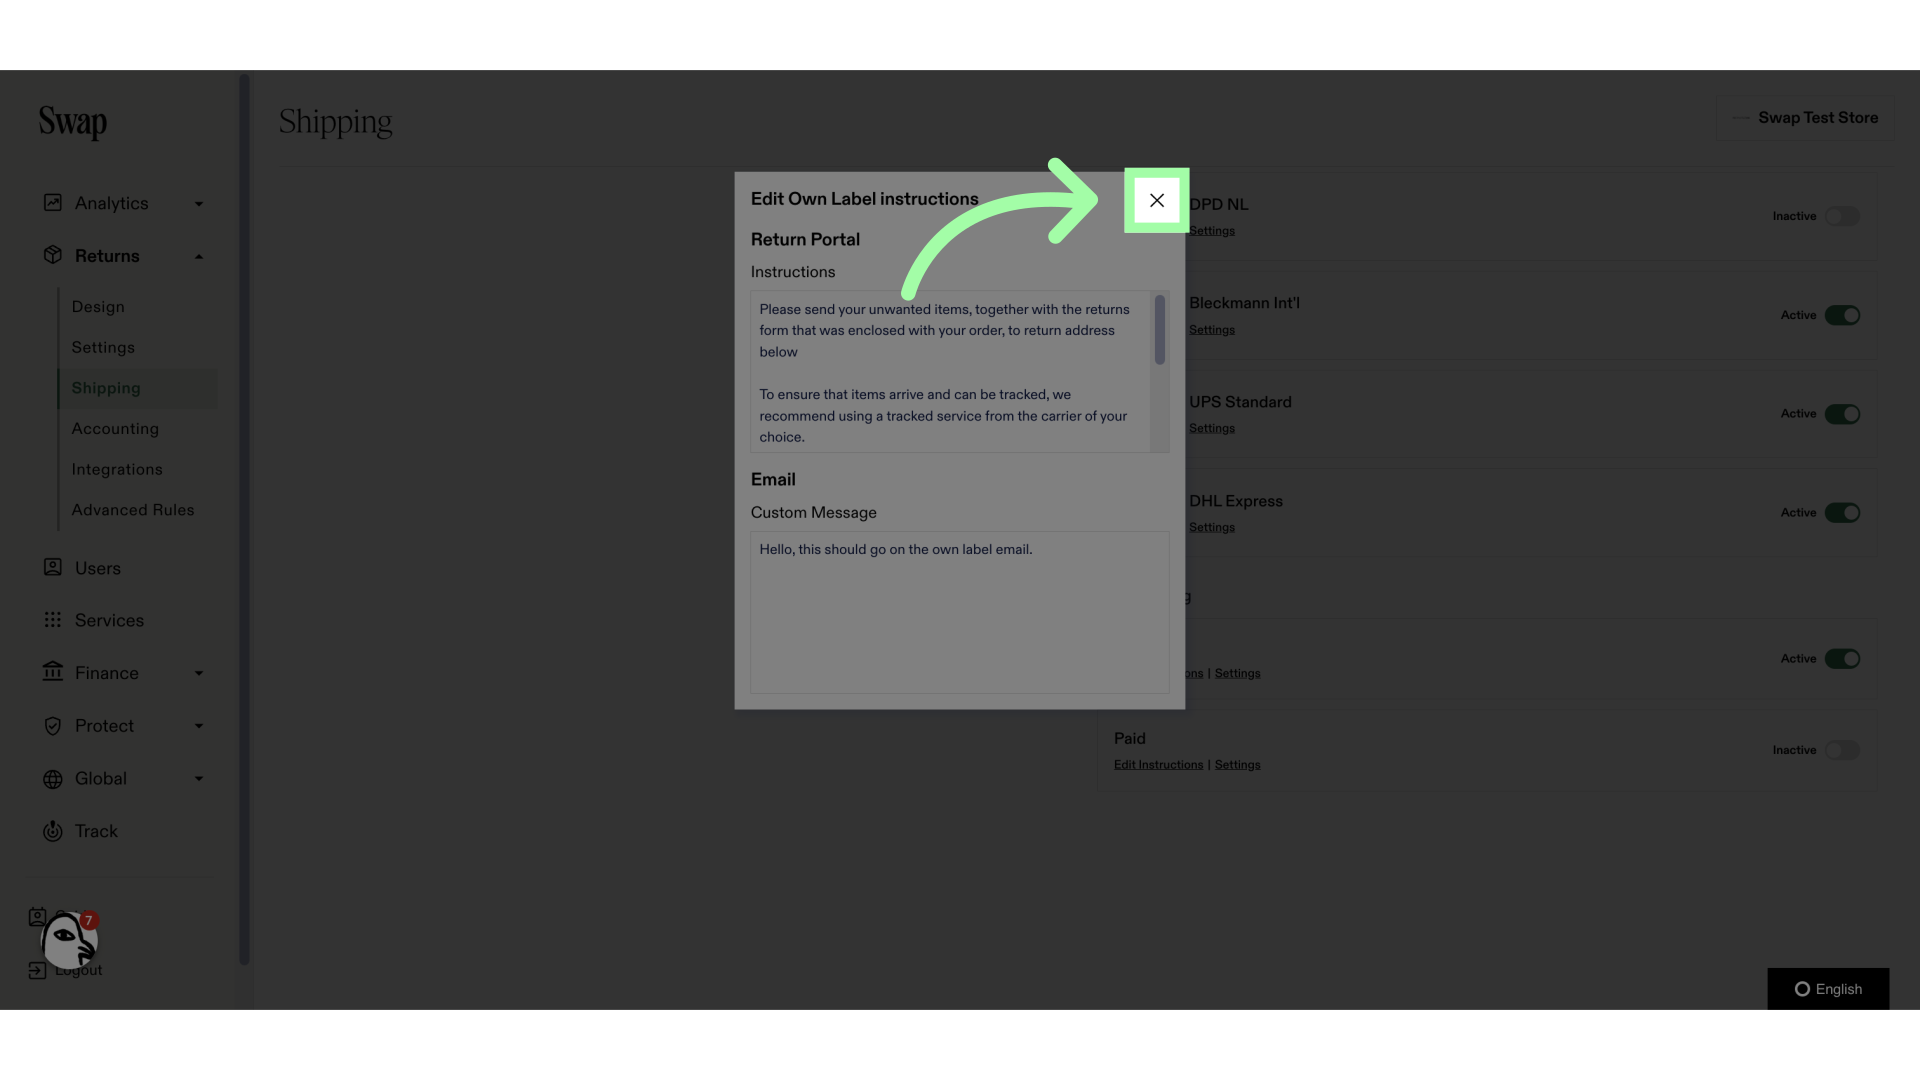
7. Close the pop-up
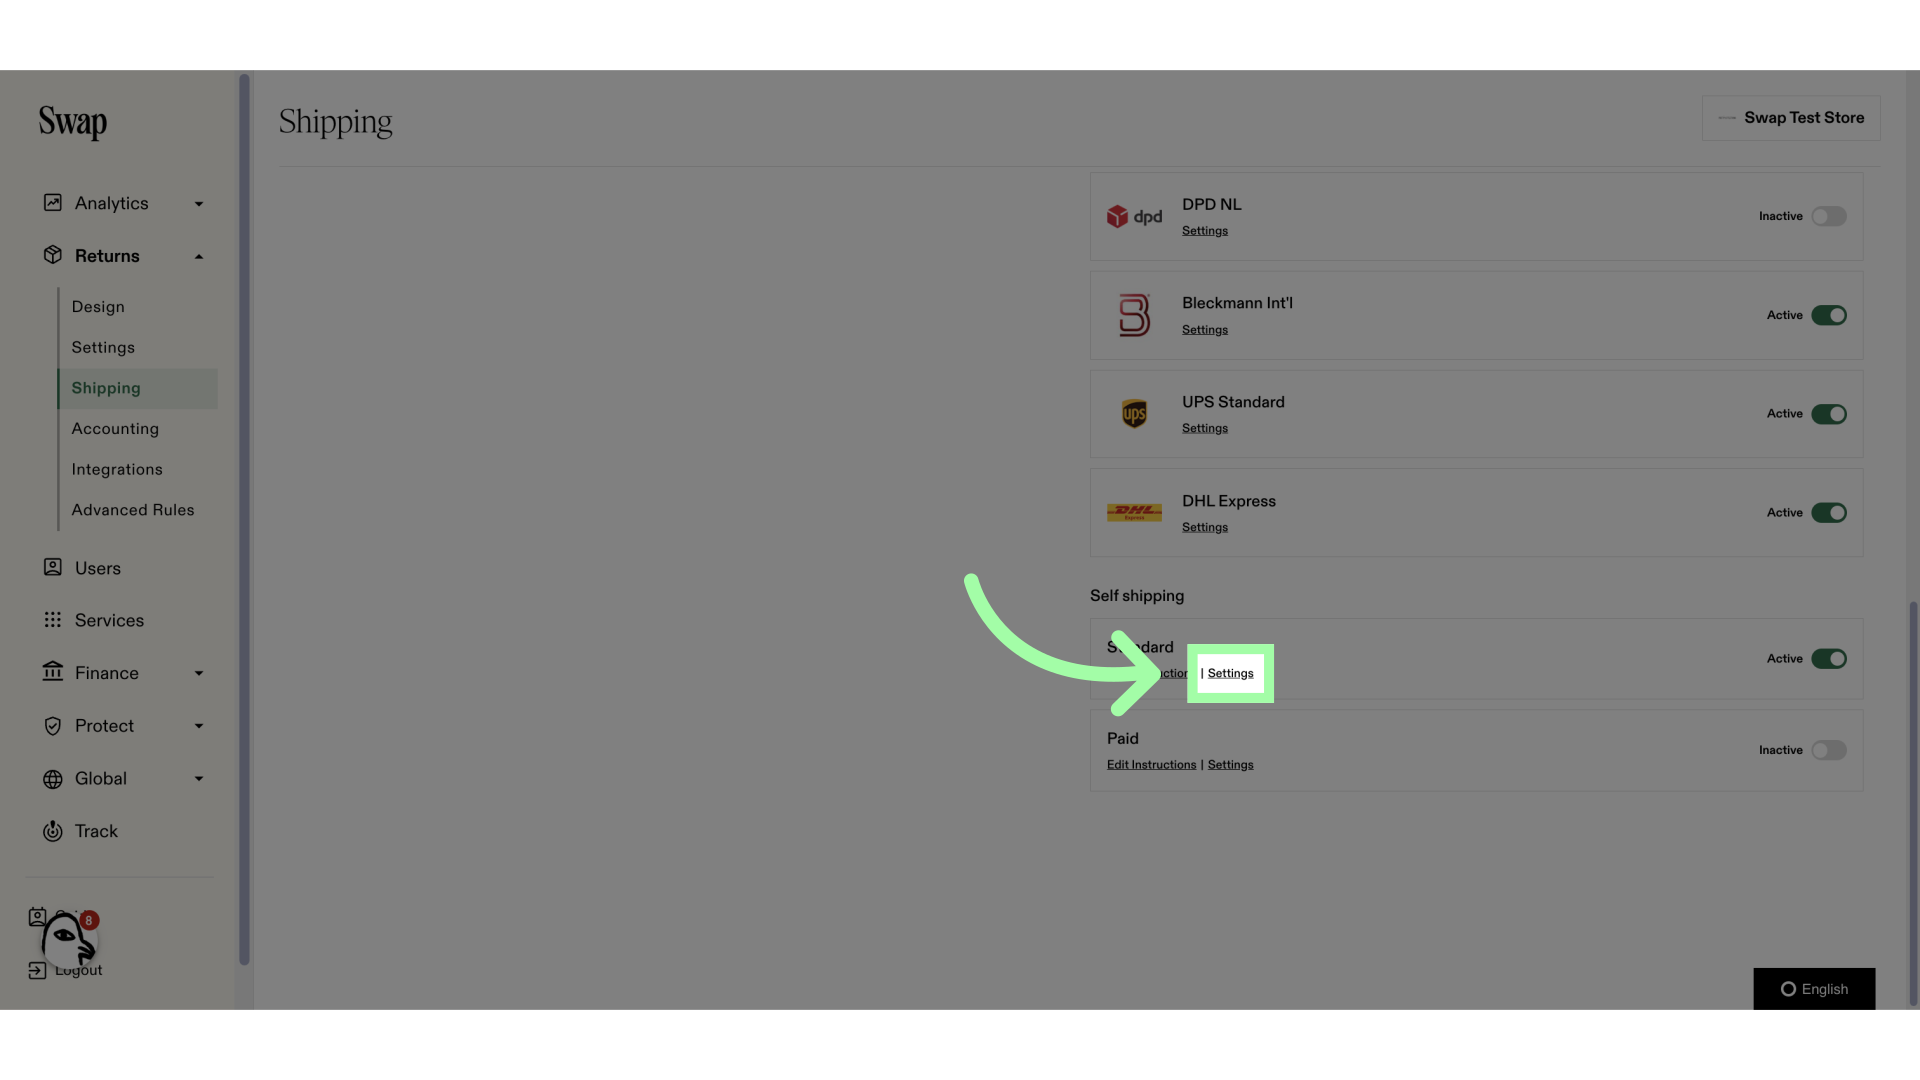
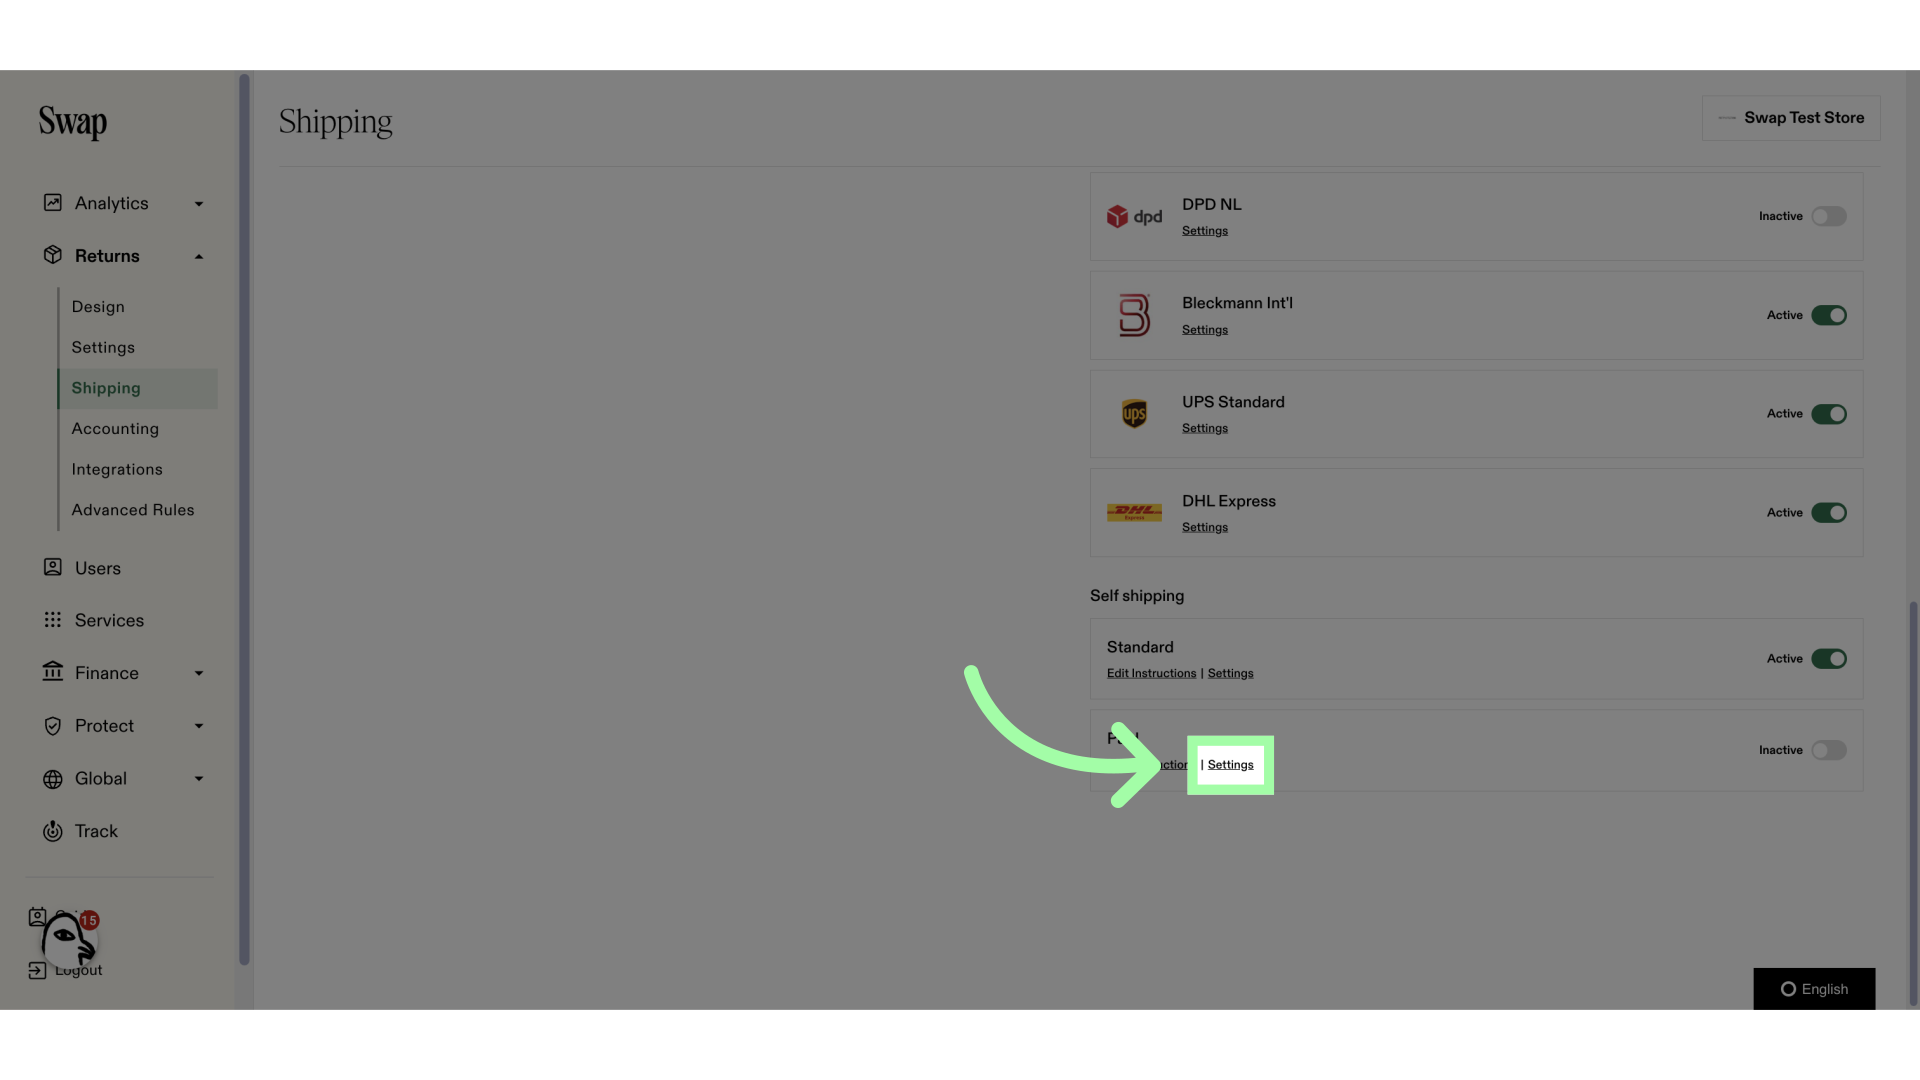
8. Click "Settings"
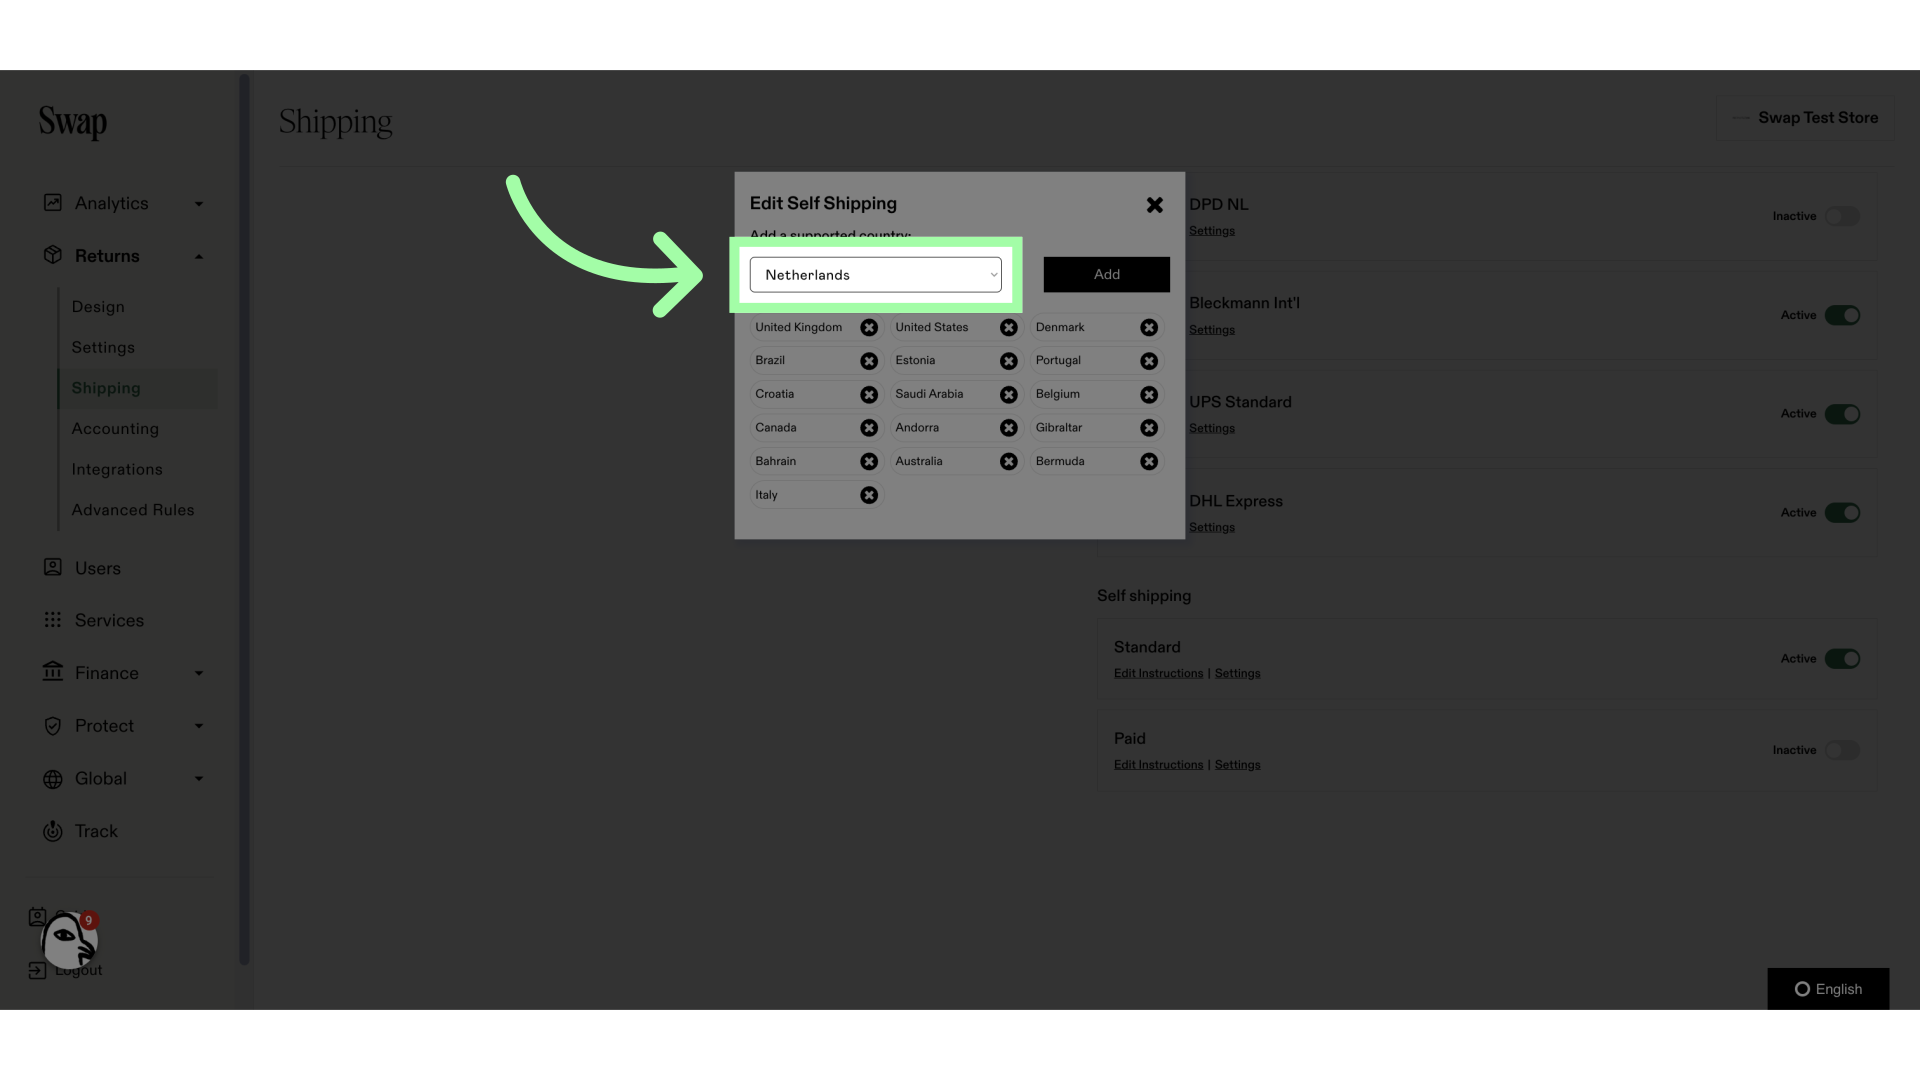
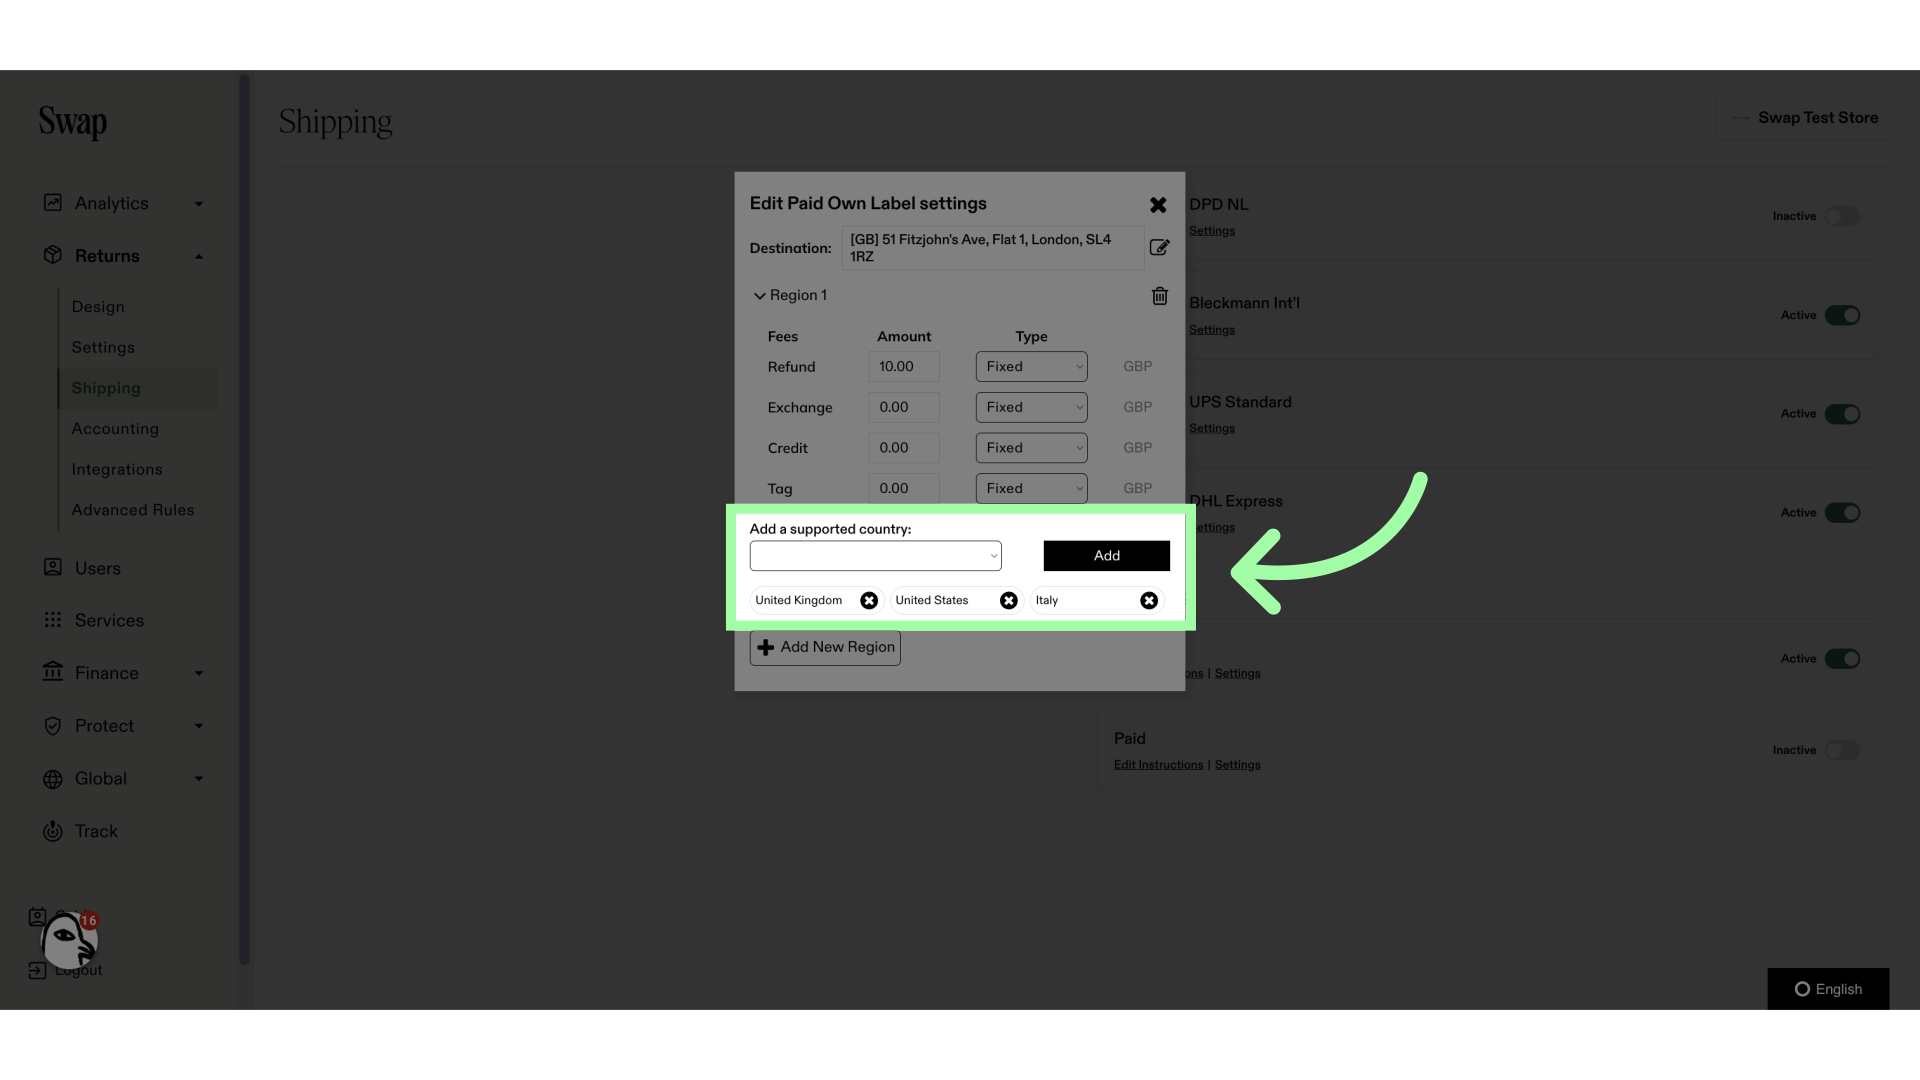
9. Click here to select a country to add
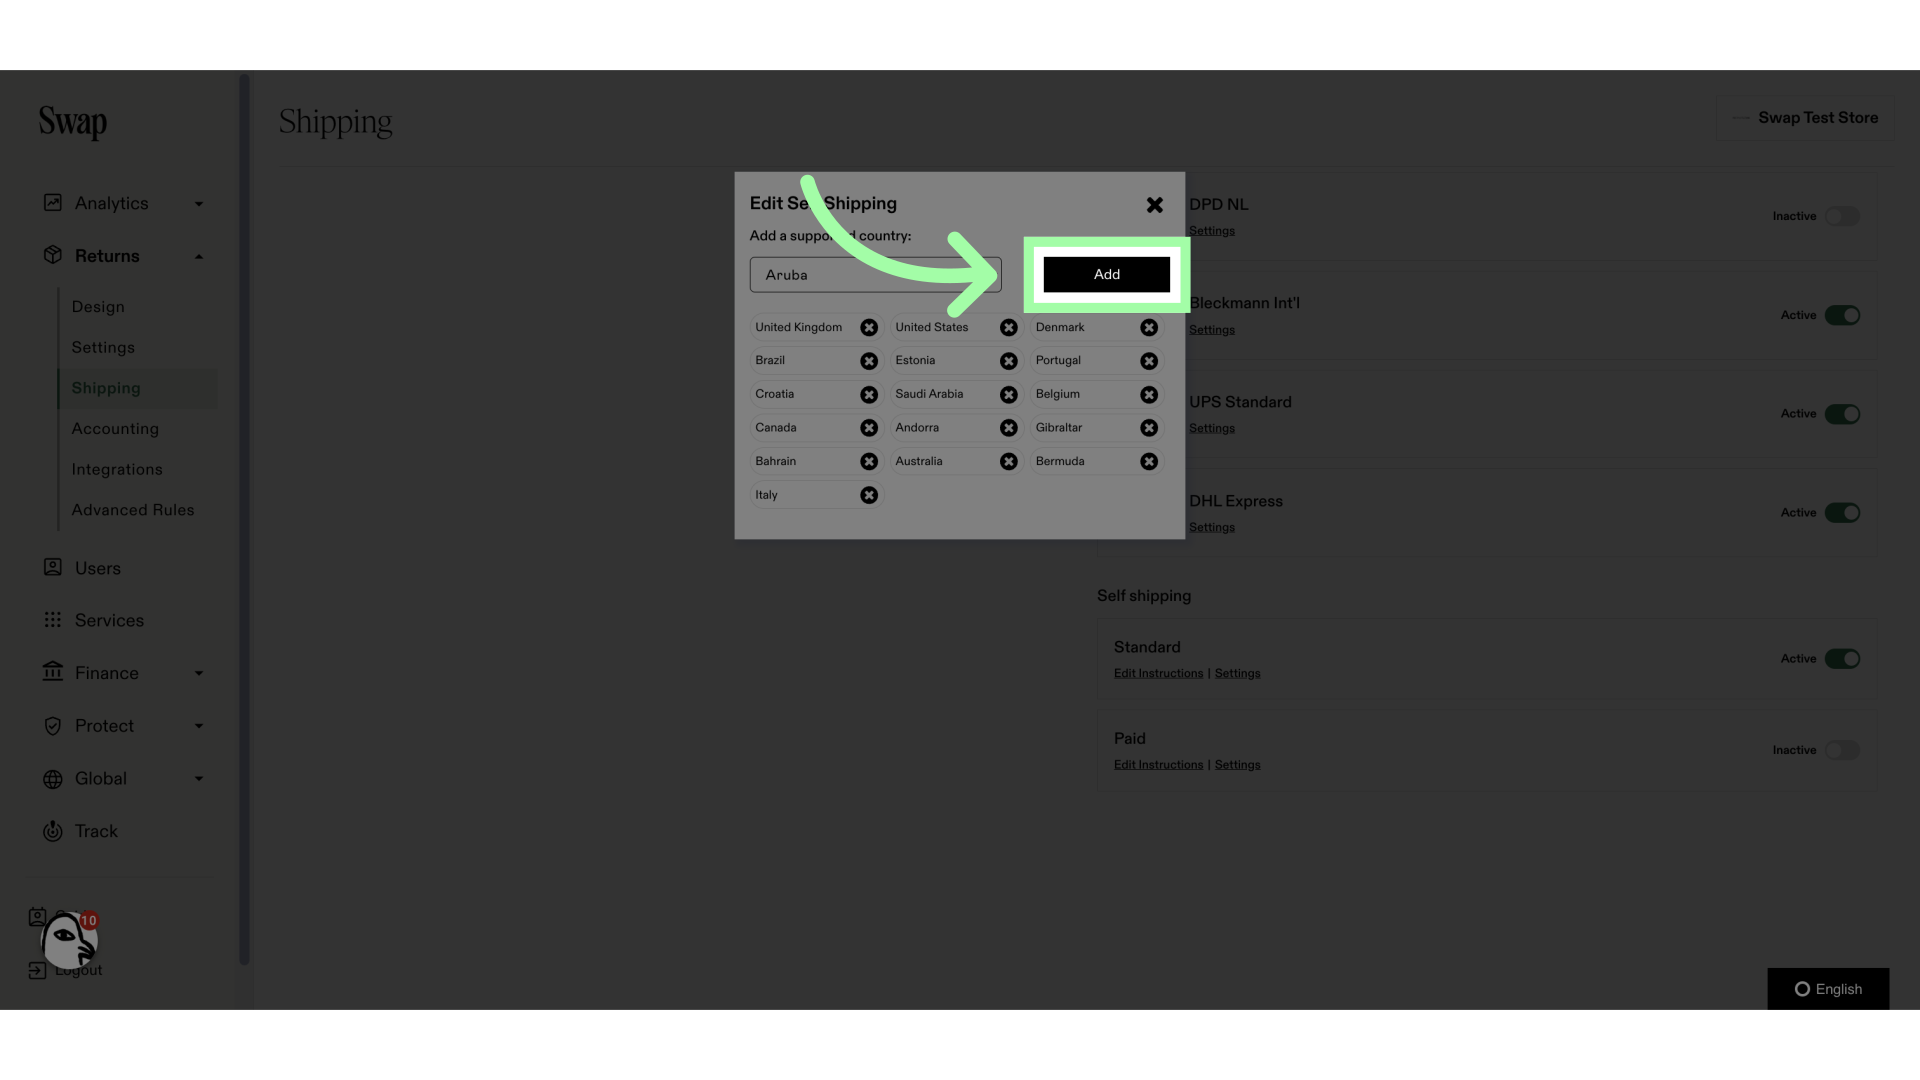
10. Click "Add"
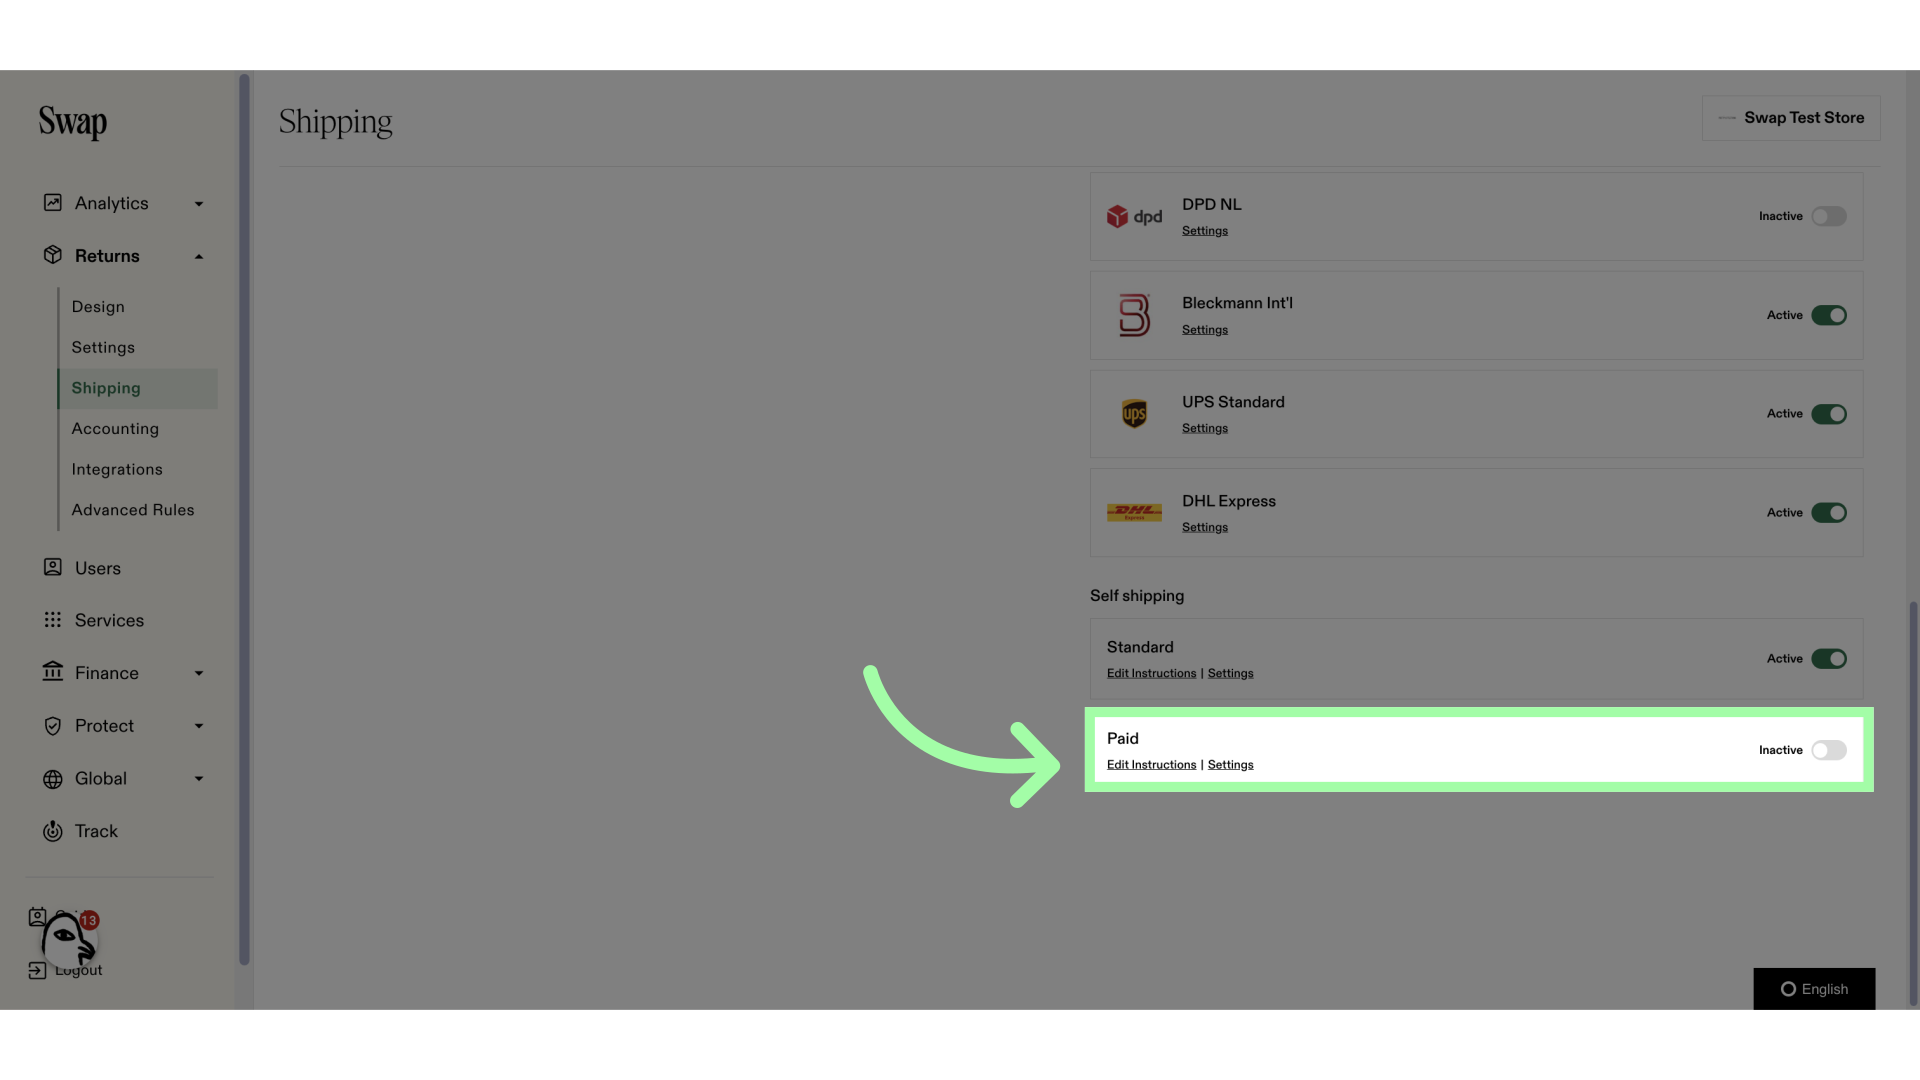
11. Paid Self Shipping allows you to put your return label in the box. Customers must select the paid self-return option and pay for the return
12. Add the specific instructions for the paid Self Shipping label
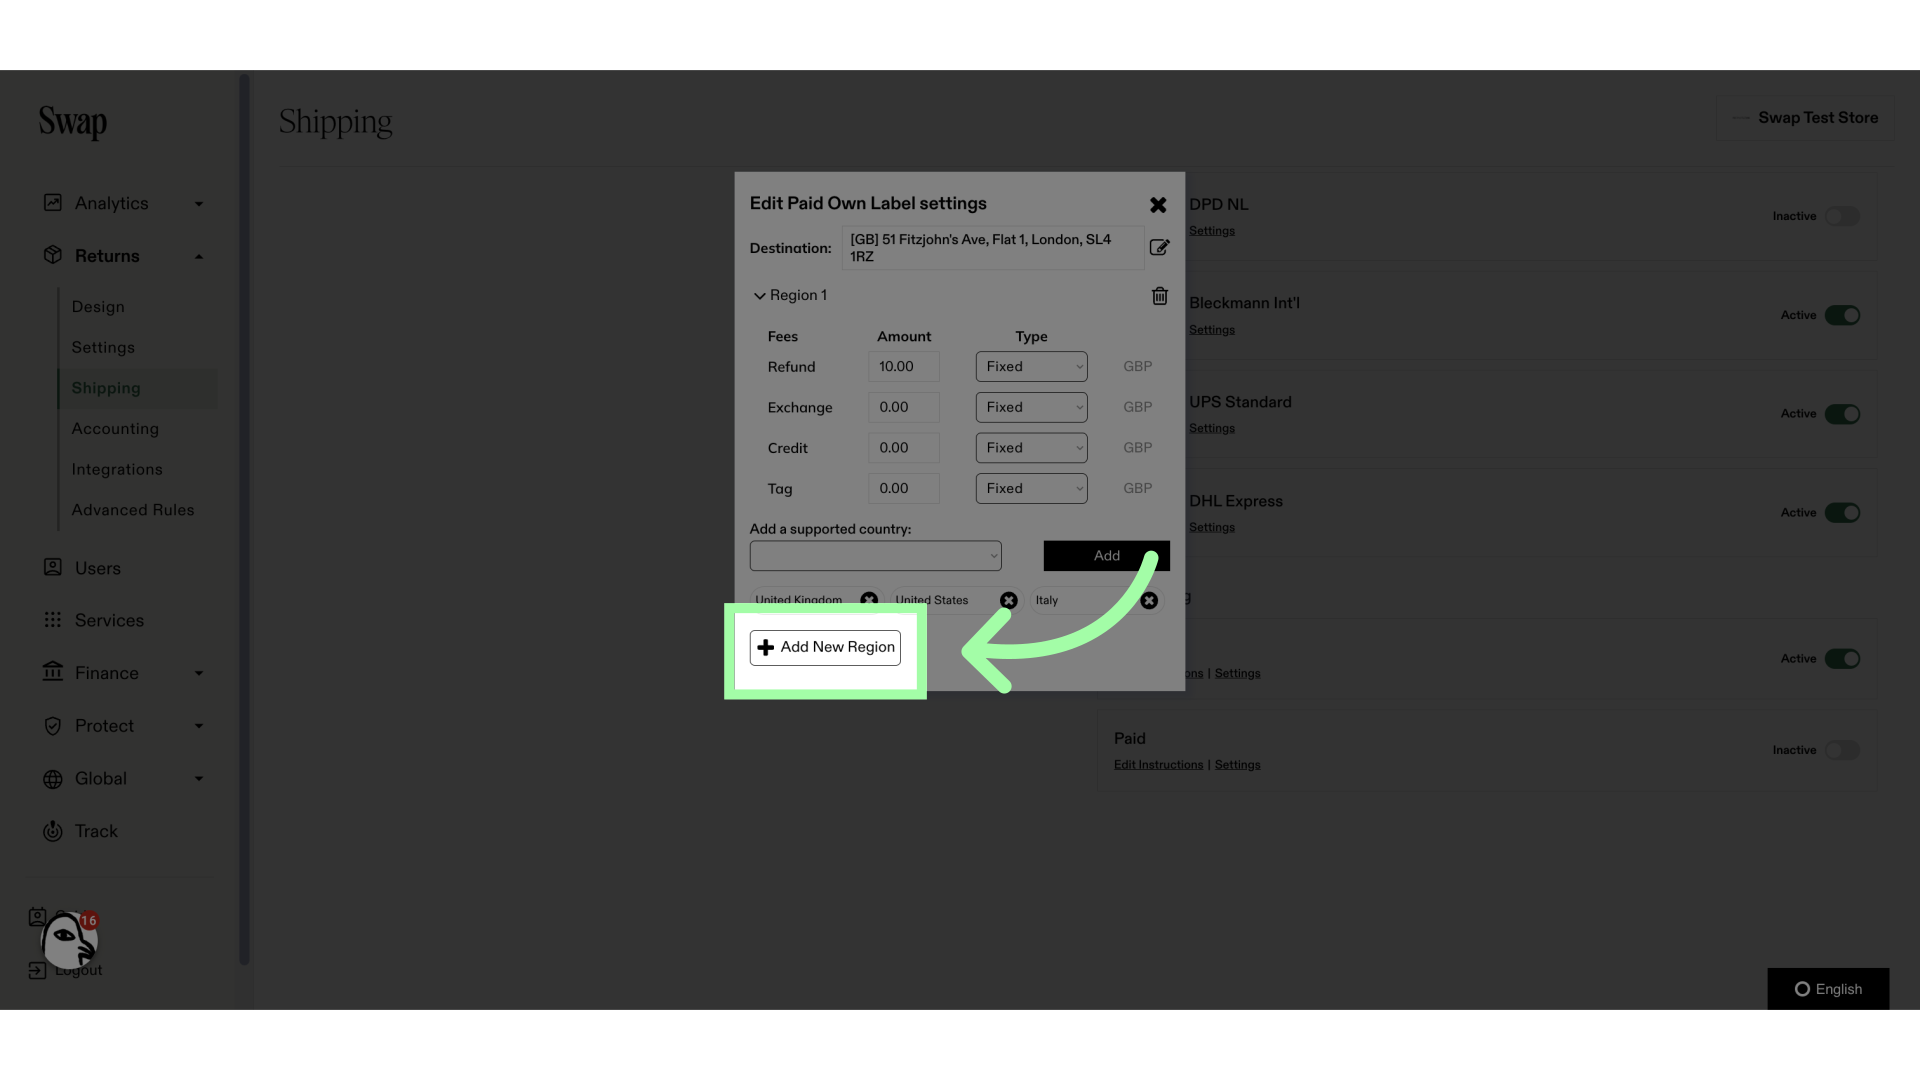
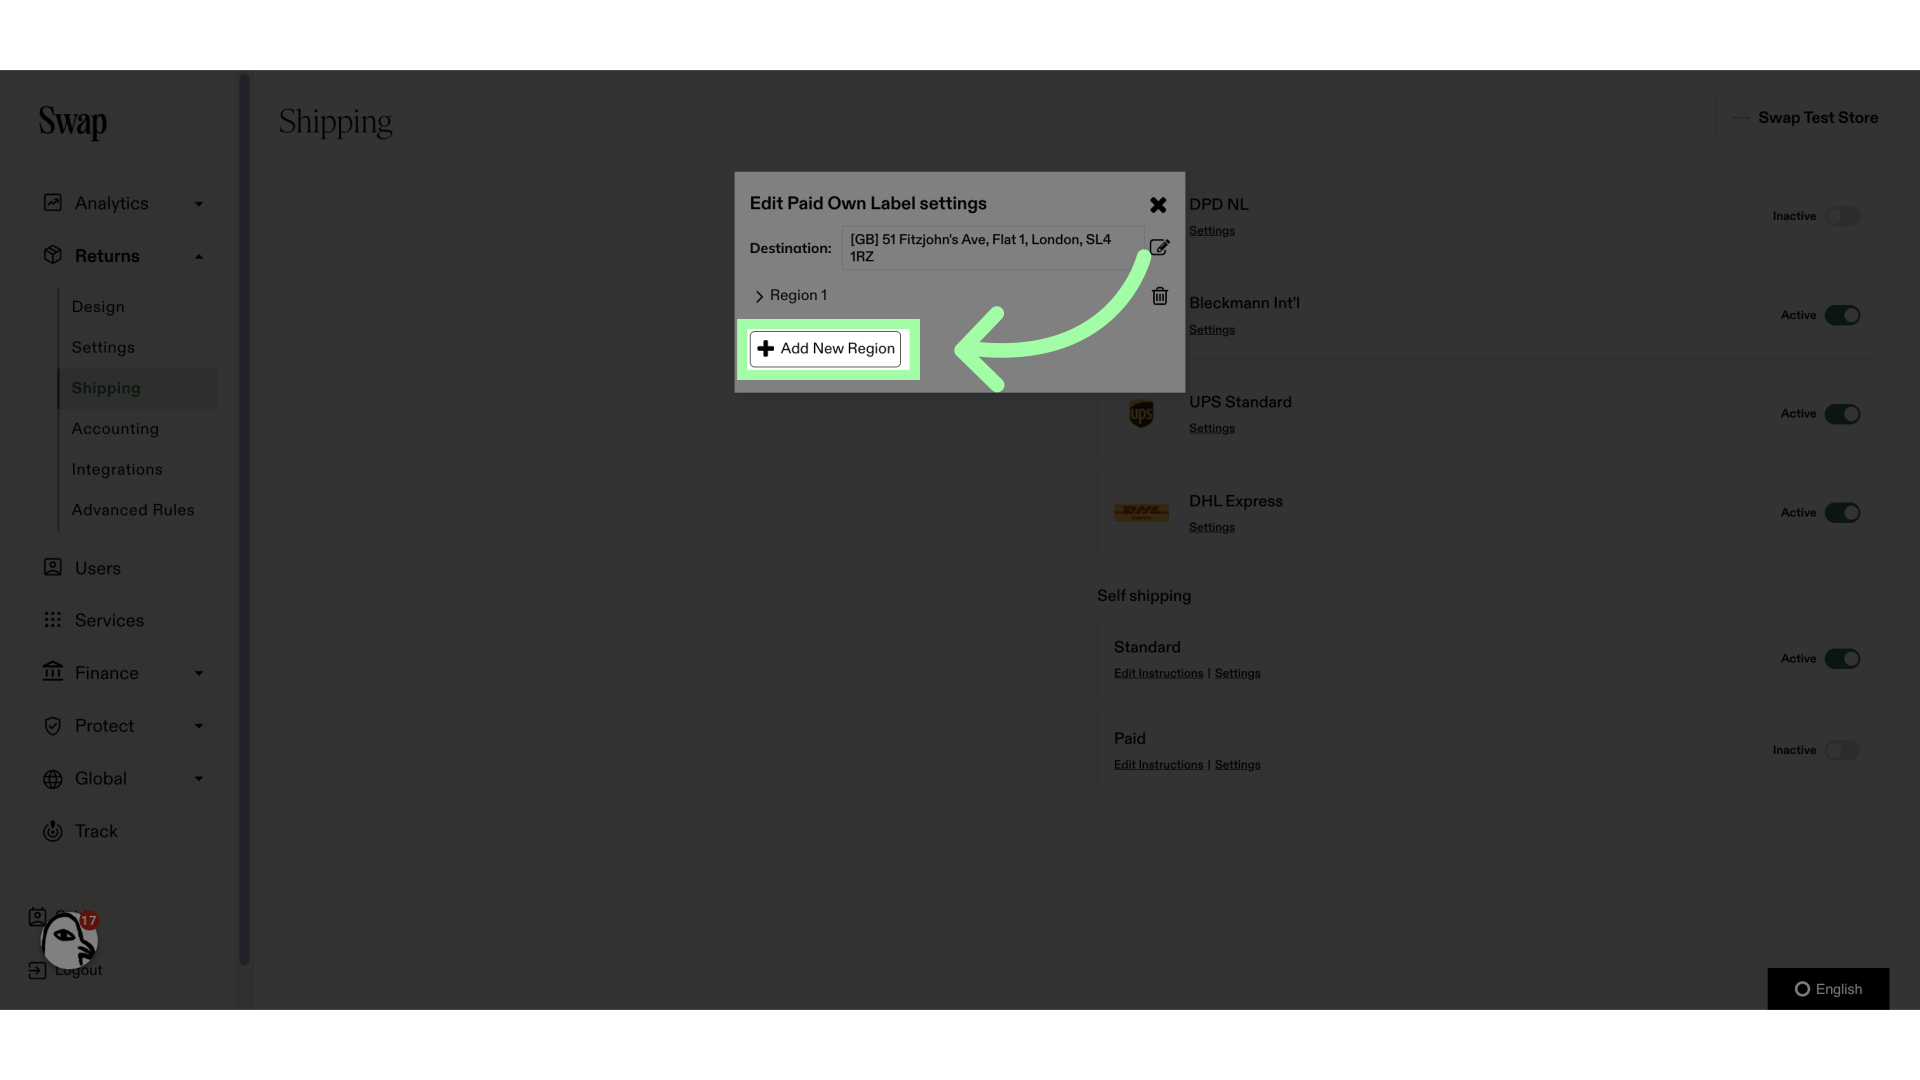
13. The paid Self Shipping settings are slightly different
14. Click here to add a region
15. You can set specific shipping rates for this region
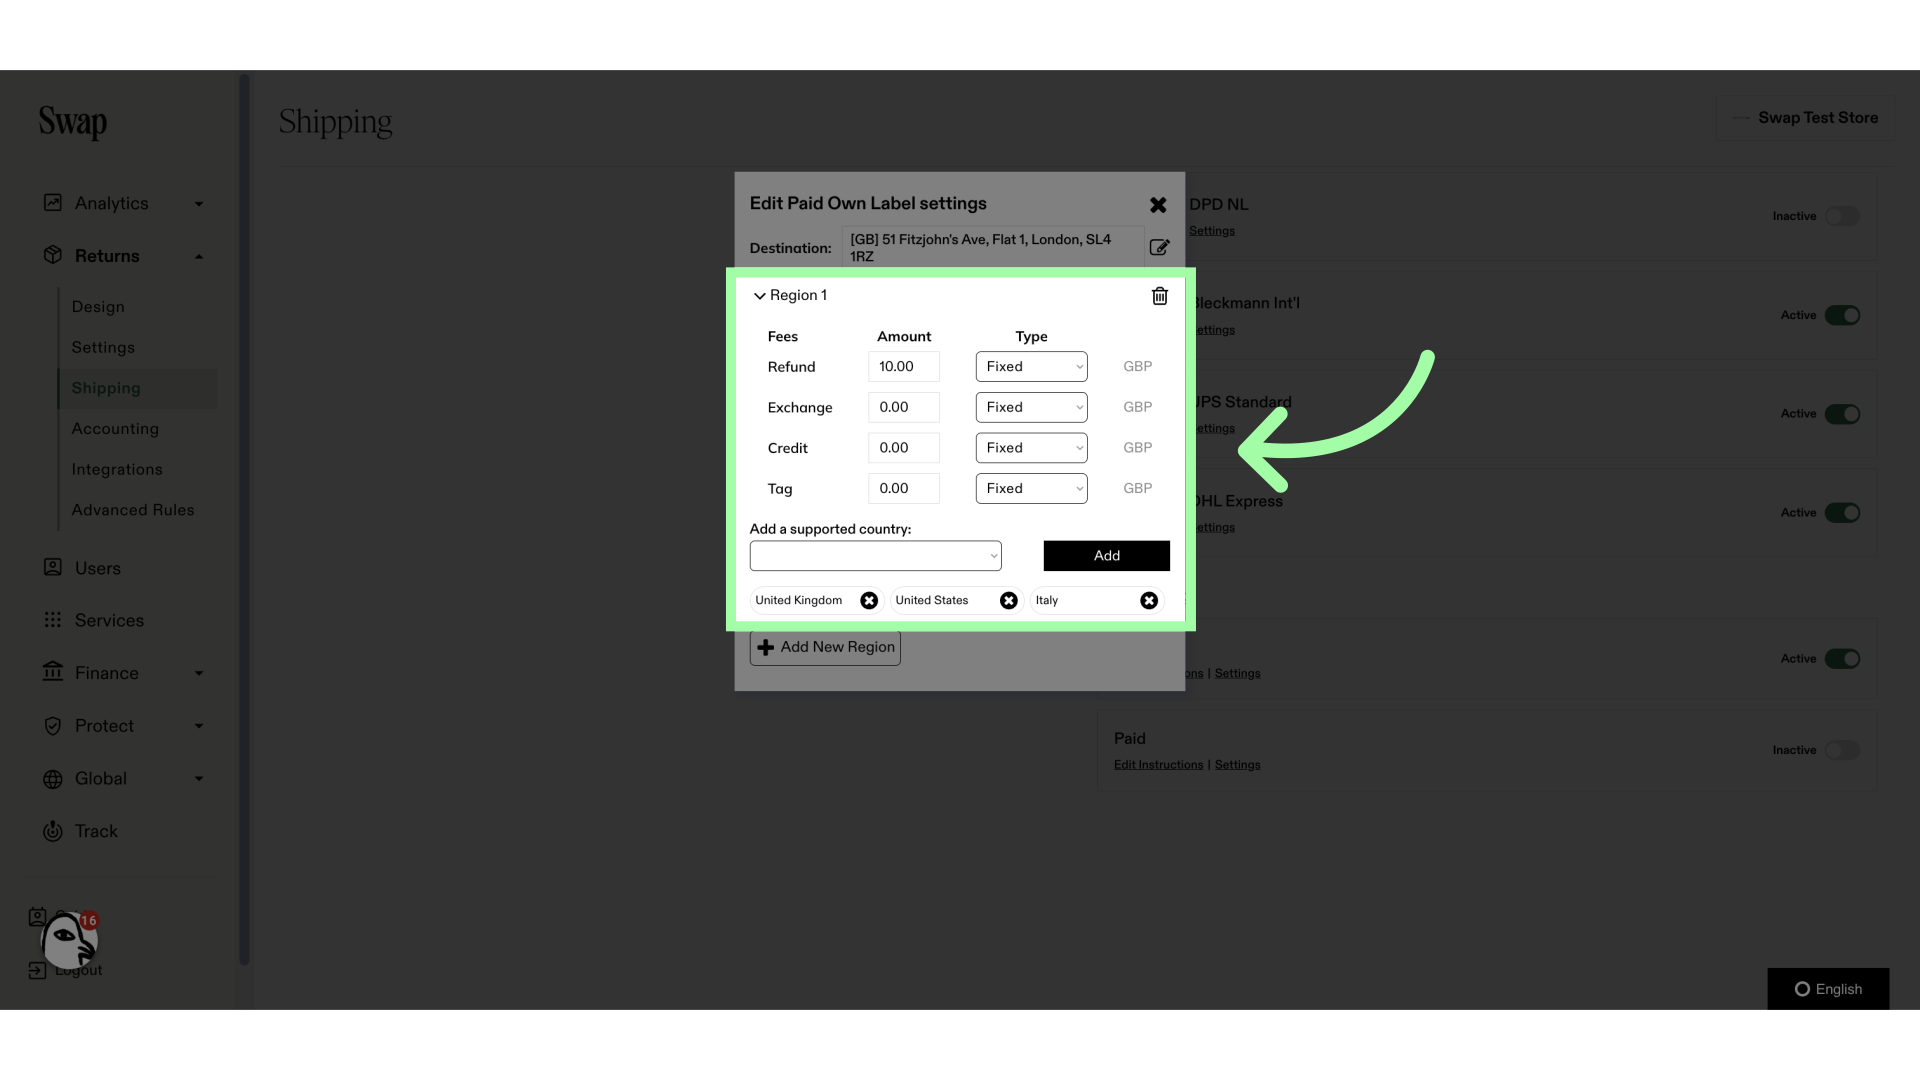
16. To add countries, use the drop-down menu
17. You can add more regions with their own specific rates